Ubuntu16安装MySQL
Ubuntu16.04下使用以下命令即可进行MySQL的安装:
apt-get install mysql-server
上述命令会安装以下包:
apparmor
mysql-client-5.7
mysql-common
mysql-server
mysql-server-5.7
mysql-server-core-5.7
因此无需再安装mysql-client等。安装过程会提示设置mysql root用户的密码,设置完成后等待自动安装即可。默认安装完成就启动了MySQL的。
- 启动和关闭的MySQL服务器:
service mysql start
service mysql stop 
- 确认是否启动成功: sudo netstat -tap | grep mysql
配置MySQL的允许远程访问:
1.首先编辑文件/etc/mysql/mysql.conf.d/mysqld.cnf:编辑配置文件就输入命令
sudo vi /etc/mysql/mysql.conf.d/mysqld.cnf
2.进入配置文件后
注释掉bind-address = 127.0.0.1:
在[mysqld]后添加skip-grant-tables(使用 set password for设置密码无效,且此后登录无需键入密码,在设置完密码后需要去掉,修改登录密码:update mysql.user set authentication_string=password("your_password") where user = 'root' and host='localhost';)
3.开启远程连接数据库服务开始授权客户端连接,非超级管理员用户启动需要加sudo否则会报错
mysql -u root -p密码
4.回车后开始授权:
use mysql;
GRANT ALL PRIVILEGES ON *.* TO 'root'@'%' IDENTIFIED BY '远程连接密码' WITH GRANT OPTION;
或者 GRANT ALL PRIVILEGES ON *.* TO 'root'@'%' IDENTIFIED BY '123456';
flush privileges;
冲洗特权;
如果是mysql8.0
会报错:ERROR 1064 (42000): You have an error in your SQL syntax; check the manual that corresponds to your MySQL server version for the right syntax to use near 'identified by '密码' with grant option' at line 1
需要分两步:
创建用户:
create user '用户'@'%' identified by '密码';
授权:
GRANT ALL PRIVILEGES ON *.* TO '用户'@'%' WITH GRANT OPTION;
报错:1251 - Client does not support authentication protocol reuqested by server;consider upgrading MySQL client
需要重置密码:
ALTER USER '用户'@'%' IDENTIFIED WITH mysql_native_password BY '密码';
5.回车之后继续输入刷新配置命名
最新数据库版本会报以下错误:
ERROR 1064 (42000): You have an error in your SQL syntax; check the manual that corresponds to your MySQL server version for the right syntax to use near 'identified by '123456' with grant option' at line 1
原因:
新版的的 mysql 已经将创建账户和赋予权限的方式分开了,原来的一条 sql 需要拆分成创建用户和授予权限两条。
解决办法:
创建用户:
create user '用户名'@'访问主机' identified by '密码';
修改权限:
grant 权限列表 on 数据库 to '用户名'@'访问主机'; (修改权限时在后面加 with grant option)
grant all privileges on *.* to '用户名'@'%';
重复修改权出现的问题:
ERROR 1062 (23000): Duplicate entry '%-root' for key 'user.PRIMARY'
原因:有多个root用户
解决办法:
先删除多余的,或者重新增加用户
需要报下面的错需要修改用户密码:
1251-client does not support authentication protocol requested by server

ALTER USER 'root'@'%' IDENTIFIED WITH mysql_native_password BY 'newpassword'; #更新一下用户的密码 root用户密码为newpassword
6.退出mysql的服务
quit;
然后输入退出命令退出mysql的服务
7.执行如下命令重启MySQL的:
service mysql restart
8.远程连接OK!
安装产生的问题、
Ubuntu16安装mysql5.7未提示输入密码,安装后修改mysql密码默认密码
mysql默认密码为空
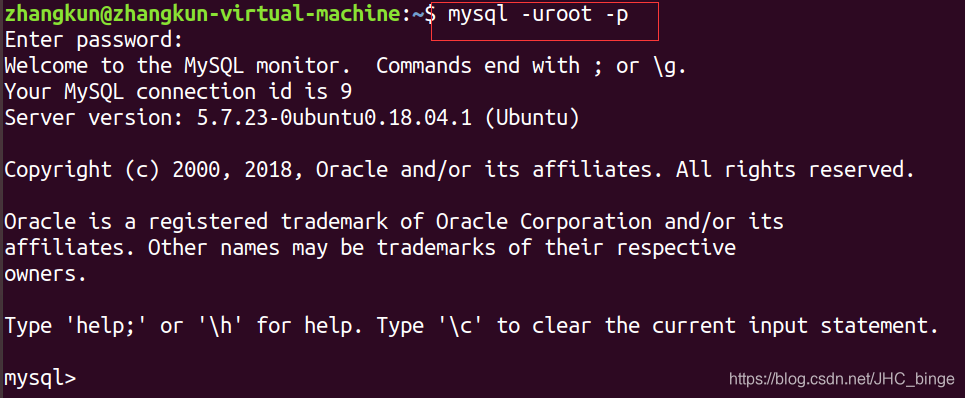
但是使用mysql -uroot -p 命令连接mysql时,报错
ERROR 1045 (28000): Access denied for user 'root'@'localhost'
此时修改root的默认密码即可
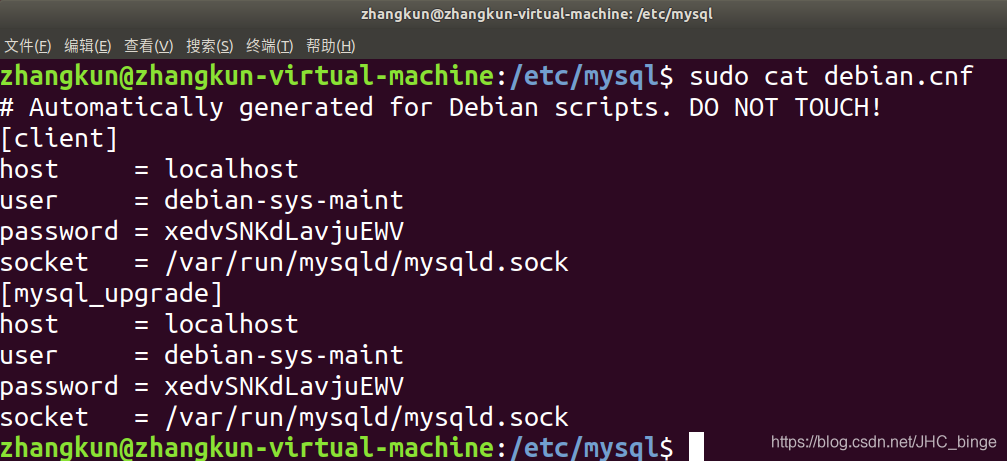
1.进入到etc/mysql 目录下,查看debian.cnf文件

2.找到用户名,密码 ,使用此账号登录mysql
用户名:debian-sys-maint
密码:xedvSNKdLavjuEWV
登录:mysql -udebian-sys-maint -pxedvSNKdLavjuEWV

3.修改root用户的的密码
这里是关键点,由于mysql5.7没有password字段,密码存储在authentication_string字段中,password()方法还能用
在mysql中执行下面语句修改密码
show databases;
use mysql;
update user set authentication_string=PASSWORD("自定义密码") where user='root';
update user set plugin="mysql_native_password";
flush privileges;
quit;
4.修改完密码,需要重启mysql
/etc/init.d/mysql restart;
就ok了
------------------------------------------------------------------------------------------------------------------------------------------
我卸载了很多遍mysql,重新装还是不提示输入密码,用这个方法解决了问题
附上卸载和安装mysql的步骤吧
安装:
# 安装的时候会提示要设置root密码,如果你没有在卸载的时候去清理残留数据是不会提示你去设置root密码的 ,我的就没提示,可以用上面的方法修改密码
sudo apt-get install mysql-client mysql-server
#检查mysql是不是在运行
sudo service mysql status
#一般安装完成之后都是会自动运行的,如果没有运行可以start
卸载:
sudo service mysql start
sudo apt purge mysql-*
sudo rm -rf /etc/mysql/ /var/lib/mysql
sudo apt autoremove
