0. 基础环境 ubuntu22.04 kvm虚拟机模板搭建
0. 基础环境 ubuntu22.04 kvm虚拟机模板搭建 小白篇
1. 背景
Centos操作系统停止维护,线上老业务统一采用Centos7.9 升级内核4.20.10+版本的规范运行。但对于一些系统依赖较高的应用如分布式集群/深度学习/算法等集群,centos默认的基础组件版本仍然较低。考虑到后续操作系统的选型,决定预使用ubuntu最新LTS版本做测试。本次制作KVM虚拟化下 ubuntu22.04 kvm虚拟机模板搭建。
2. 物理服务器环境和依赖
2.1. 服务器配置:
- 型号: R720xd
- cpu: E5-2620 v2 24C
- 内存: 246G
- OS: Centos7.9
服务器配置详情:
[root@bj-test-kvm-2-122 ~]# dmidecode -t system |grep Product
	Product Name: PowerEdge R720xd
[root@bj-test-kvm-2-122 ~]# lscpu |head -n 30
Architecture:          x86_64
CPU op-mode(s):        32-bit, 64-bit
Byte Order:            Little Endian
CPU(s):                24
On-line CPU(s) list:   0-23
Thread(s) per core:    2
Core(s) per socket:    6
Socket(s):             2
NUMA node(s):          2
Vendor ID:             GenuineIntel
CPU family:            6
Model:                 62
Model name:            Intel(R) Xeon(R) CPU E5-2620 v2 @ 2.10GHz
Stepping:              4
CPU MHz:               1203.039
CPU max MHz:           2600.0000
CPU min MHz:           1200.0000
BogoMIPS:              4200.10
Virtualization:        VT-x
L1d cache:             32K
L1i cache:             32K
L2 cache:              256K
L3 cache:              15360K
NUMA node0 CPU(s):     0,2,4,6,8,10,12,14,16,18,20,22
NUMA node1 CPU(s):     1,3,5,7,9,11,13,15,17,19,21,23
Flags:                 fpu vme de pse tsc msr pae mce cx8 apic sep mtrr pge mca cmov pat pse36 clflush dts acpi mmx fxsr sse sse2 ss ht tm pbe syscall nx pdpe1gb rdtscp lm constant_tsc arch_perfmon pebs bts rep_good nopl xtopology nonstop_tsc aperfmperf eagerfpu pni pclmulqdq dtes64 monitor ds_cpl vmx smx est tm2 ssse3 cx16 xtpr pdcm pcid dca sse4_1 sse4_2 x2apic popcnt tsc_deadline_timer aes xsave avx f16c rdrand lahf_lm ssbd ibrs ibpb stibp tpr_shadow vnmi flexpriority ept vpid fsgsbase smep erms xsaveopt dtherm ida arat pln pts md_clear spec_ctrl intel_stibp flush_l1d
[root@bj-test-kvm-2-122 ~]# free -g
              total        used        free      shared  buff/cache   available
Mem:            251           9         231           2          11         239
Swap:             9           0           9
[root@bj-test-kvm-2-122 ~]# cat /etc/redhat-release
CentOS Linux release 7.9.2009 (Core)
2.2 物理服务器初始化
虚拟化软件安装
服务器基础环境初始化略
yum -y install kvm libvirt python-virtinst qemu-kvm virt-install virt-viewer bridge-utils libguestfs libguestfs-tools
systemctl restart network
virsh net-destroy default
systemctl restart libvirtd
virsh net-destroy default
virsh net-undefine default
virsh net-list
brctl show
配置聚合桥接网络
交换机配置聚合启用lacp
# cat team_vlan_bridge.sh
#!/bin/bash
# 配置bridge桥接 ----> 配置vlan接口指定桥接----> 配置team端口组,指定lacp  ---->  配置team-slave子接口
# bridge.stp no 不启用stp,不进行网络计算,连通性快,若开启该参数,部分网络,需要先互ping下才能通
# NetworkManager 默认接口会配置dhcp,若dhcp无法获取ip地址,重试一定次数后,该连接失败,配置不生效.
# 对于team/team-slave/vlan接口 由于有上层有master, 接口无须配置ip地址,也不用配置
# 对于不需要配置ip地址的接口,需要配置proxy.method none ipv4.method disabled  ipv6.method ignore 忽略NetworkManager 检查

nmcli c s
#nmcli c a con-name test-wan type bridge ifname test-wan bridge.stp no proxy.method none ipv4.method disabled  ipv6.method ignore #不配置ip地址
nmcli c a con-name test-wan type bridge ifname test-wan bridge.stp no proxy.method none ipv4.method manual ipv4.address 10.8.3.78/24
nmcli c  a con-name team0v4 ifname team0.4 type vlan dev team0 id 4 master test-wan
#nmcli c a con-name test-lan type bridge ifname test-lan bridge.stp no proxy.method none ipv4.method disabled  ipv6.method ignore #不配置ip地址
nmcli c a con-name test-lan type bridge ifname test-lan bridge.stp no proxy.method none ipv4.method manual ipv4.address 10.8.2.62/24
nmcli c  a con-name team0v2 ifname team0.2 type vlan dev team0 id 2 master test-lan
##nmcli c a con-name test-idrac type bridge ifname test-idrac bridge.stp no proxy.method none ipv4.method disabled  ipv6.method ignore #不配置ip地址
nmcli c a con-name test-idrac type bridge ifname test-idrac bridge.stp no proxy.method none ipv4.method manual ipv4.address 192.168.20.77/24
nmcli c  a con-name team0v20 ifname team0.20 type vlan dev team0 id 2 master test-idrac

nmcli c a con-name team0 type team ifname team0  config '{"runner":{"name":"lacp"}}' ipv4.meth disabled ipv6.meth ignore
nmcli c s
nmcli c a con-name team0-p6p1 type team-slave ifname p6p1 master team0
nmcli c a con-name team0-p6p2 type team-slave ifname p6p2 master team0
nmcli c a con-name team0-p6p3 type team-slave ifname p6p3 master team0
nmcli c a con-name team0-p6p4 type team-slave ifname p6p4 master team0
nmcli c s
3. kvm虚拟机安装
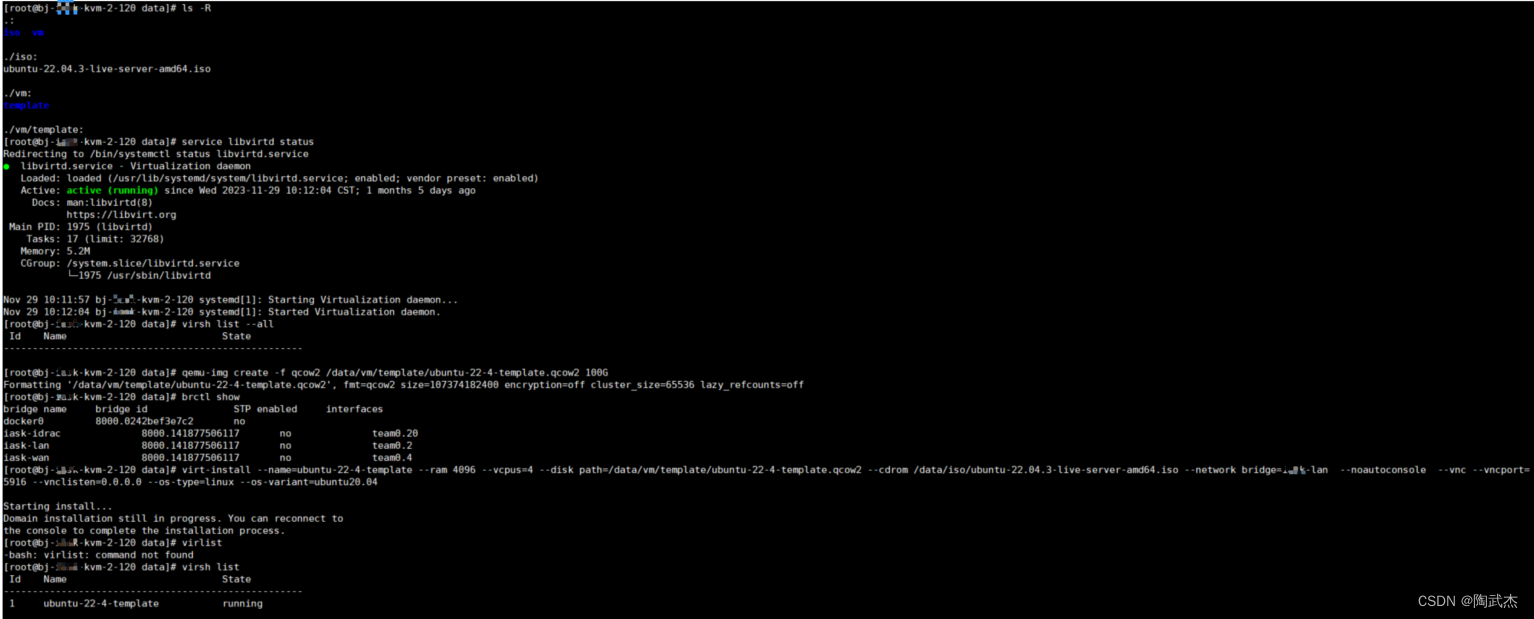
3.1 创建qcow2磁盘:
qemu-img create -f qcow2 /data/vm/template/ubuntu-22-4-template.qcow2 100G
3.2 创建虚拟机:
virt-install --name=ubuntu-22-4-template --ram 4096 --vcpus=4 --disk path=/data/vm/template/ubuntu-22-4-template.qcow2 --cdrom /data/iso/ubuntu-22.04.3-live-server-amd64.iso --network bridge=test-lan --noautoconsole --vnc --vncport=5916 --vnclisten=0.0.0.0 --os-type=linux --os-variant=ubuntu20.04
\ --vnc 启用vnc,
若想直接禁用网卡设备名称显示,启用console则需添加参数:–extra-args ‘net.ifnames=0 biosdevname=0 console=ttyS0,115200n8 serial’ 。本次手动修改虚拟机系统
[root@bj-test-kvm-2-120 data]# qemu-img create -f qcow2 /data/vm/template/ubuntu-22-4-template.qcow2 100G
Formatting '/data/vm/template/ubuntu-22-4-template.qcow2', fmt=qcow2 size=107374182400 encryption=off cluster_size=65536 lazy_refcounts=off
[root@bj-test-kvm-2-120 data]# brctl show
bridge name	bridge id		STP enabled	interfaces
docker0		8000.0242bef3e7c2	no
test-idrac		8000.141877506117	no		team0.20
test-lan		8000.141877506117	no		team0.2
test-wan		8000.141877506117	no		team0.4
[root@bj-test-kvm-2-120 data]# virt-install --name=ubuntu-22-4-template --ram 4096 --vcpus=4 --disk path=/data/vm/template/ubuntu-22-4-template.qcow2 --cdrom /data/iso/ubuntu-22.04.3-live-server-amd64.iso --network bridge=test-lan  --noautoconsole  --vnc --vncport=5916 --vnclisten=0.0.0.0 --os-type=linux --os-variant=ubuntu20.04

Starting install...
Domain installation still in progress. You can reconnect to
the console to complete the installation process.
[root@bj-test-kvm-2-120 data]# virlist
-bash: virlist: command not found
[root@bj-test-kvm-2-120 data]# virsh list
 Id    Name                           State
----------------------------------------------------
 1     ubuntu-22-4-template           running

[root@bj-test-kvm-2-120 data]# virsh console 1
Connected to domain ubuntu-22-4-template
Escape character is ^]

[root@bj-test-kvm-2-120 data]# virsh domblklist 1
Target     Source
------------------------------------------------
vda        /data/vm/template/ubuntu-22-4-template.qcow2
hda        /data/iso/ubuntu-22.04.3-live-server-amd64.iso
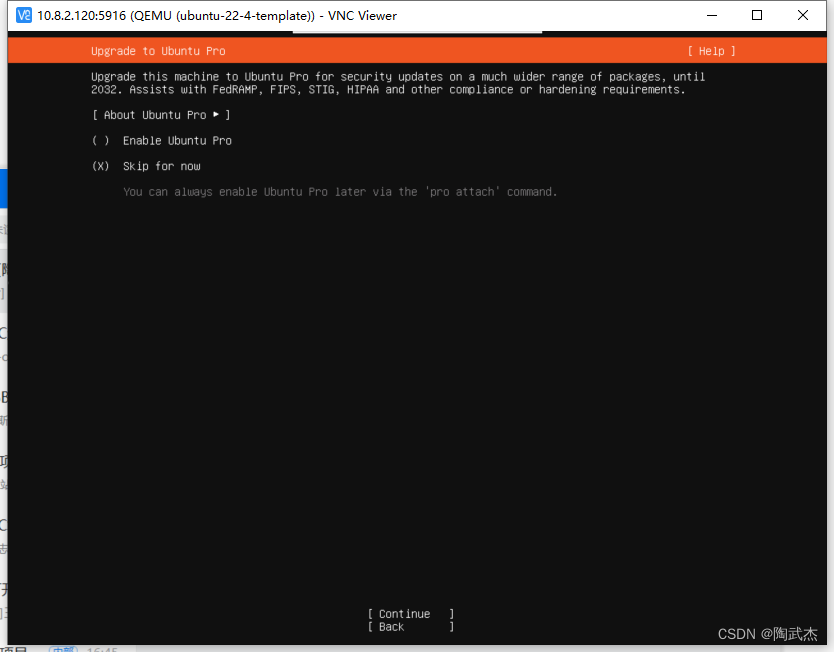
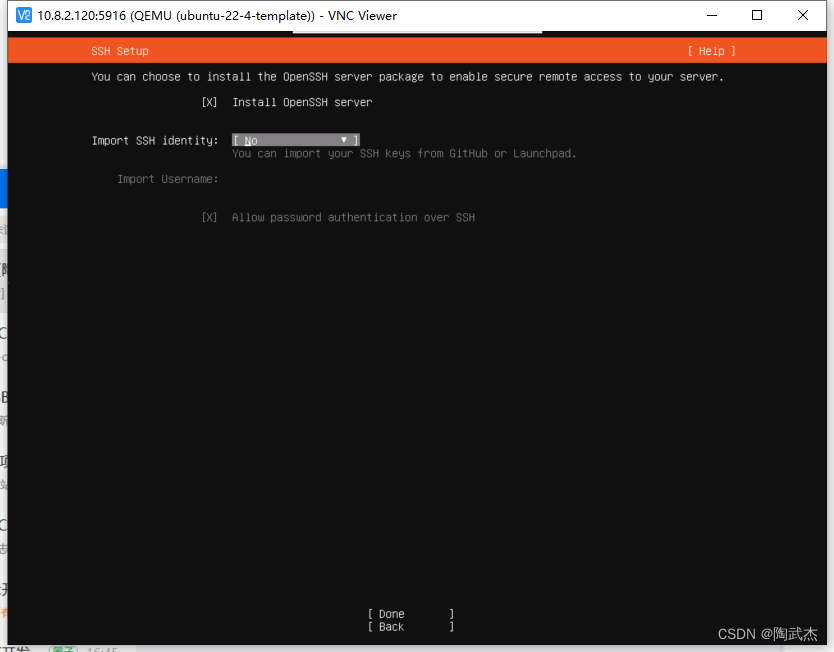
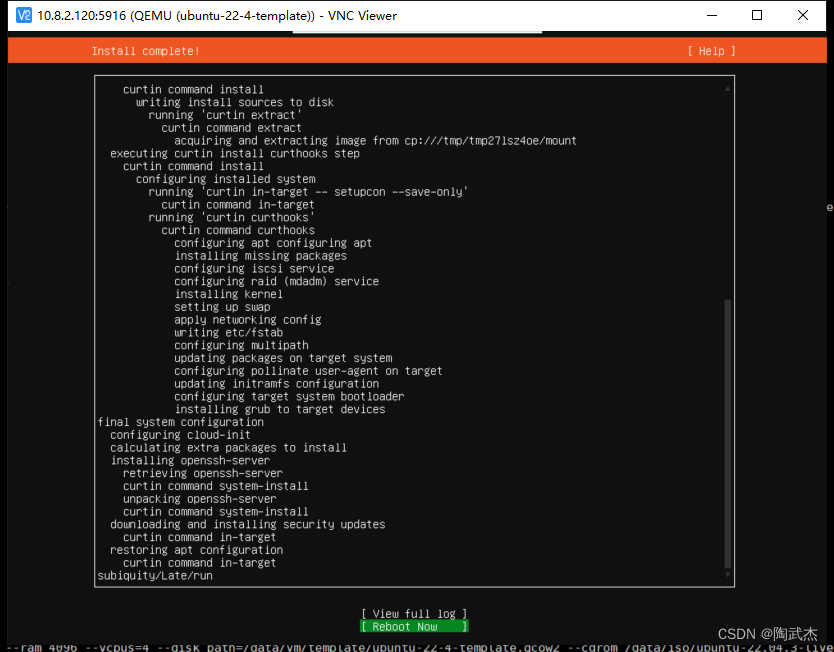
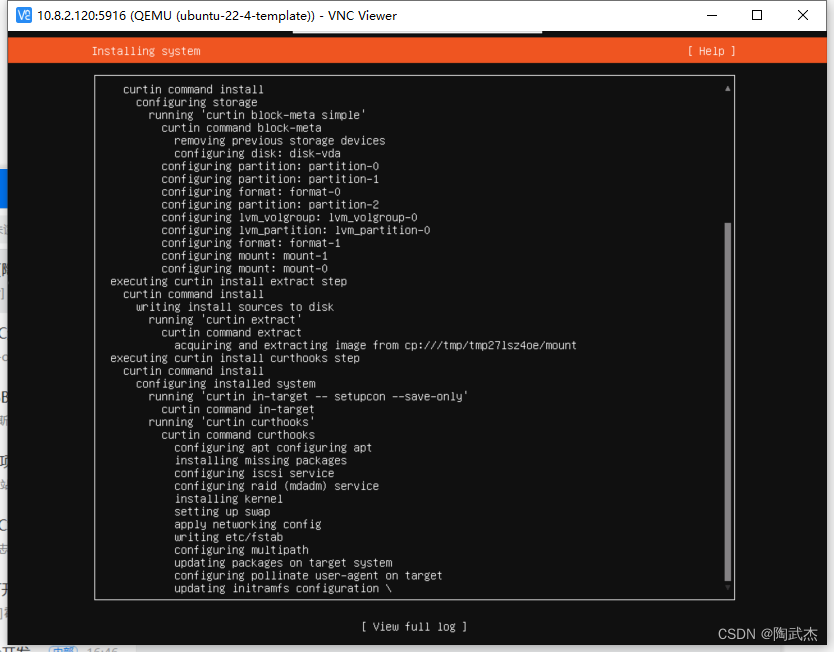
3.3 vnc 图形化安装
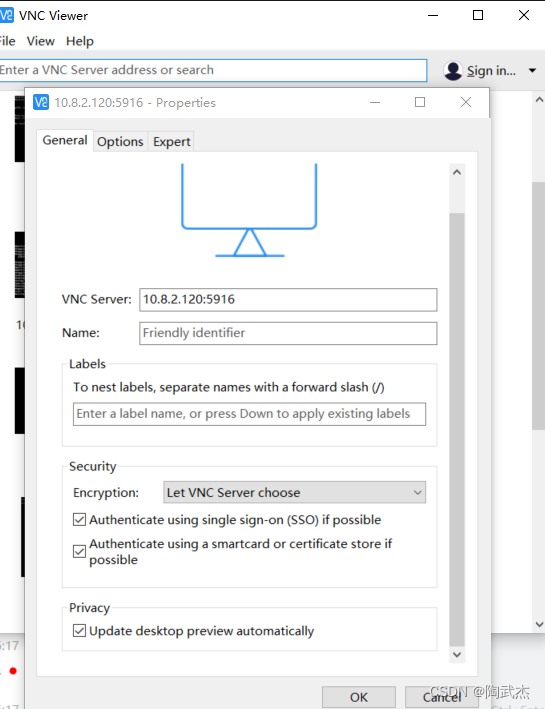
获取kvm虚拟机vnc端口

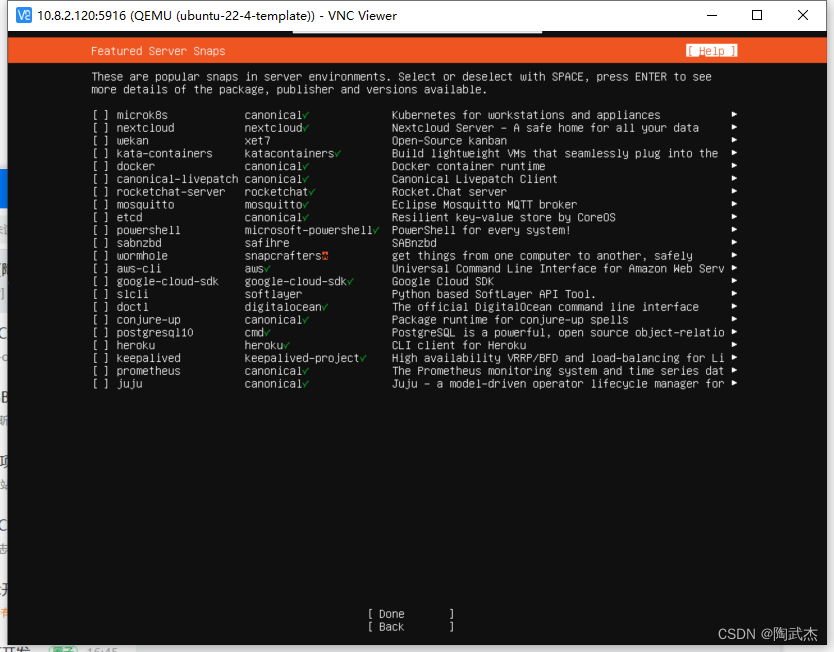
连接vnc图形化,图形化方式安装系统:
按e临时修改引导内核扩展参数:
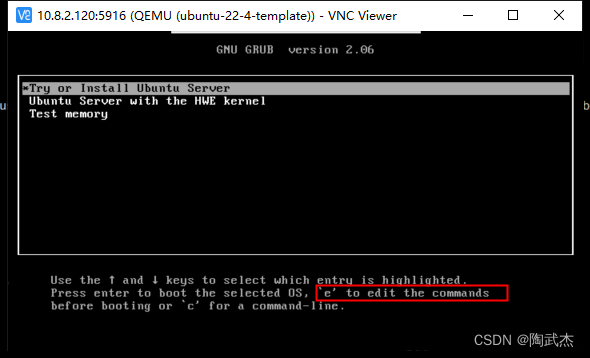
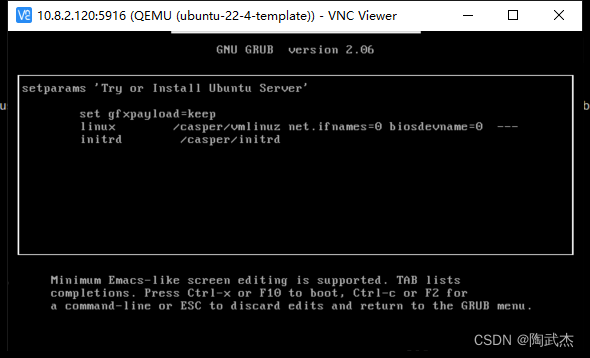
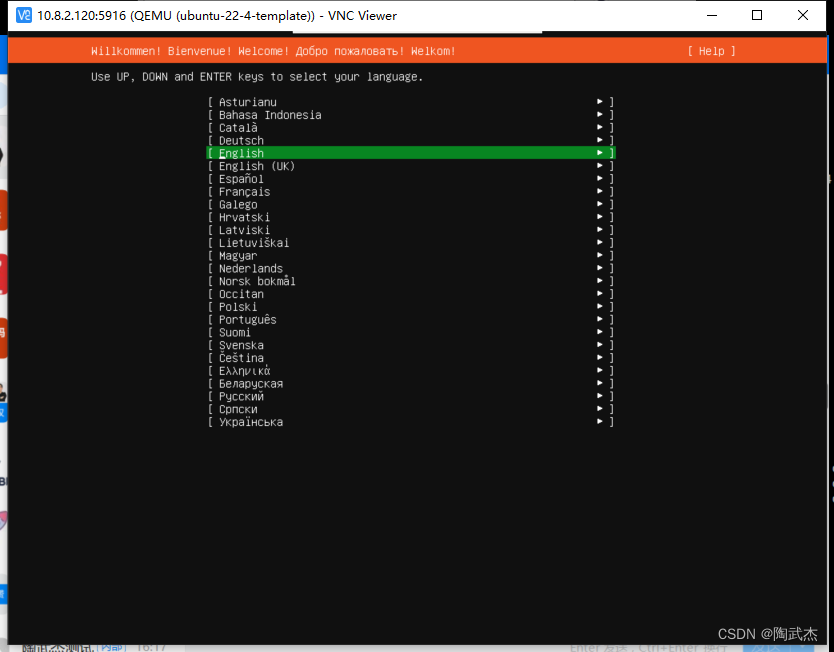
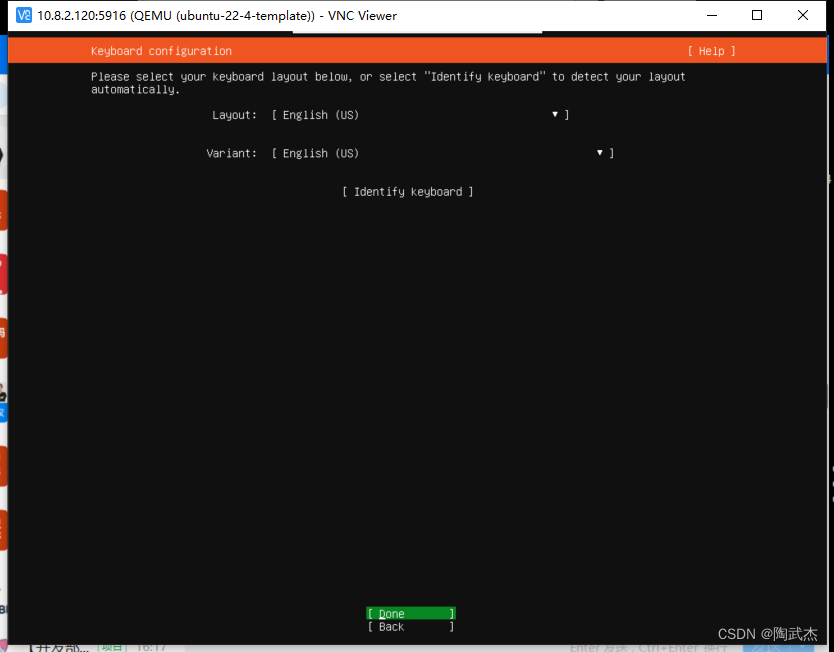
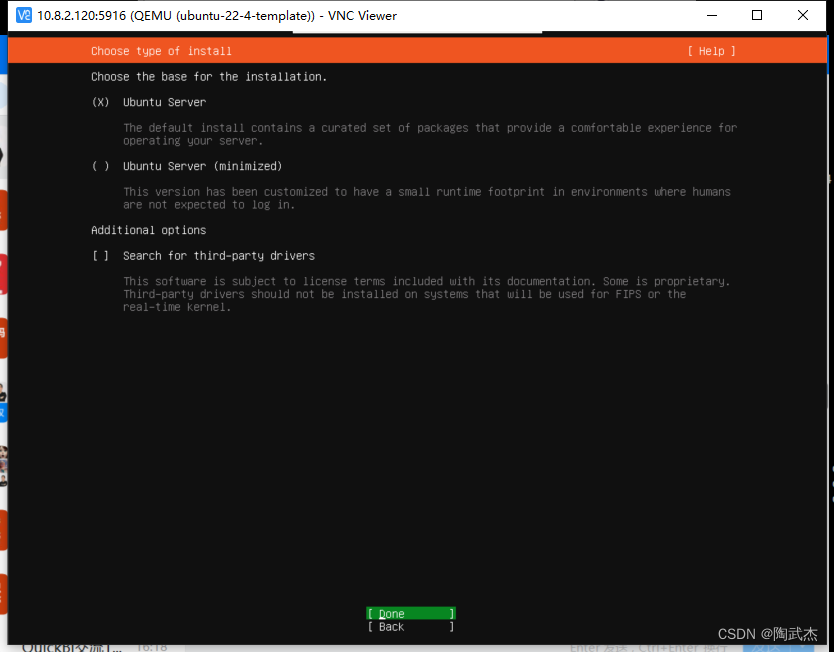
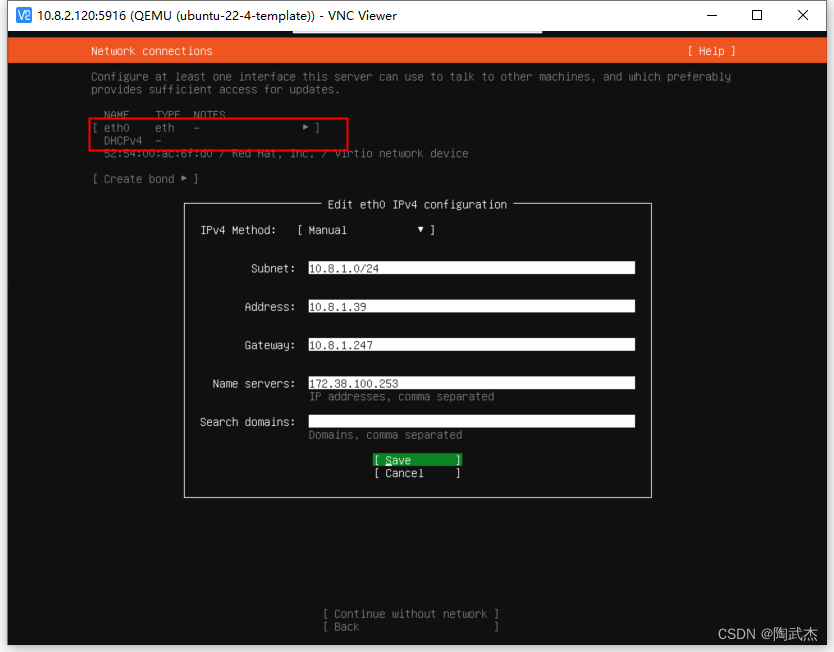
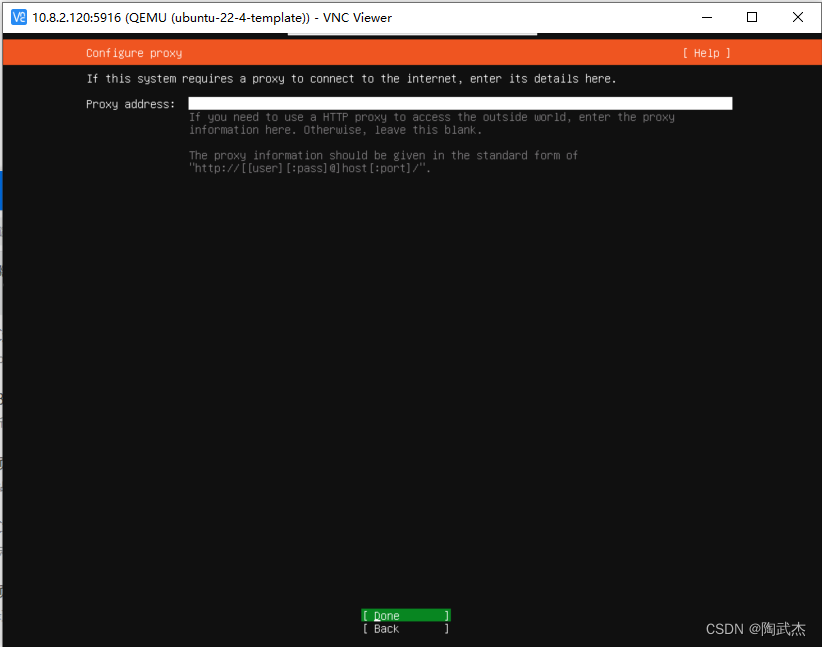
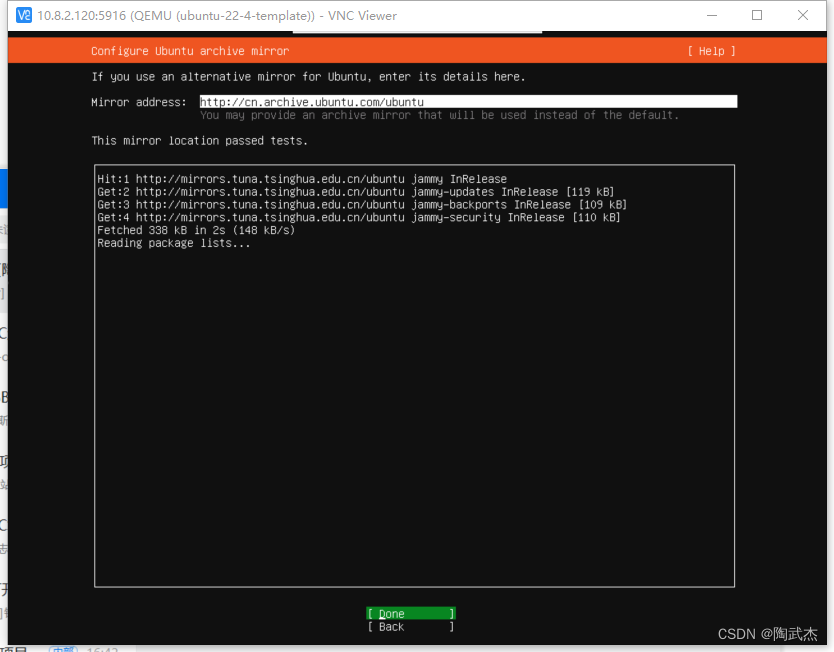
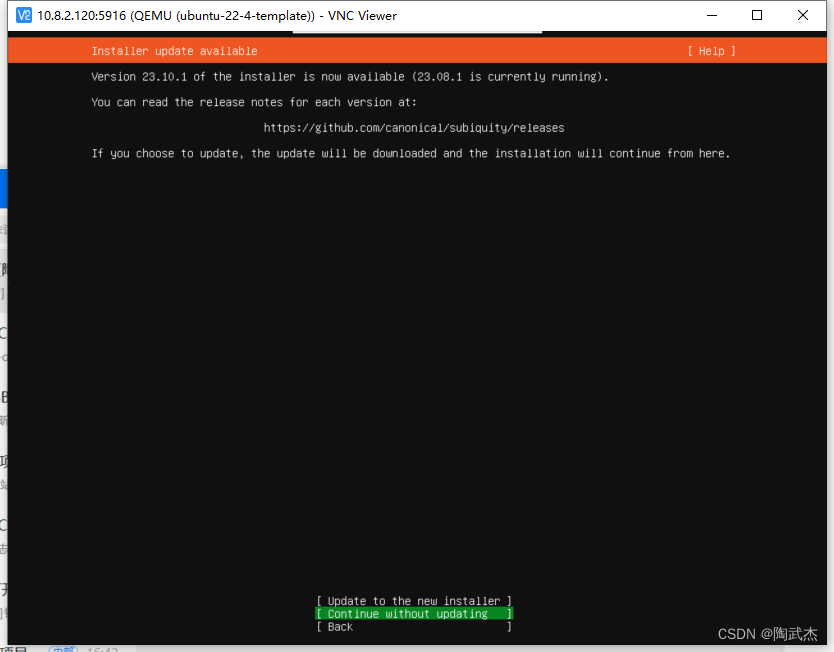
’
配置磁盘分区:
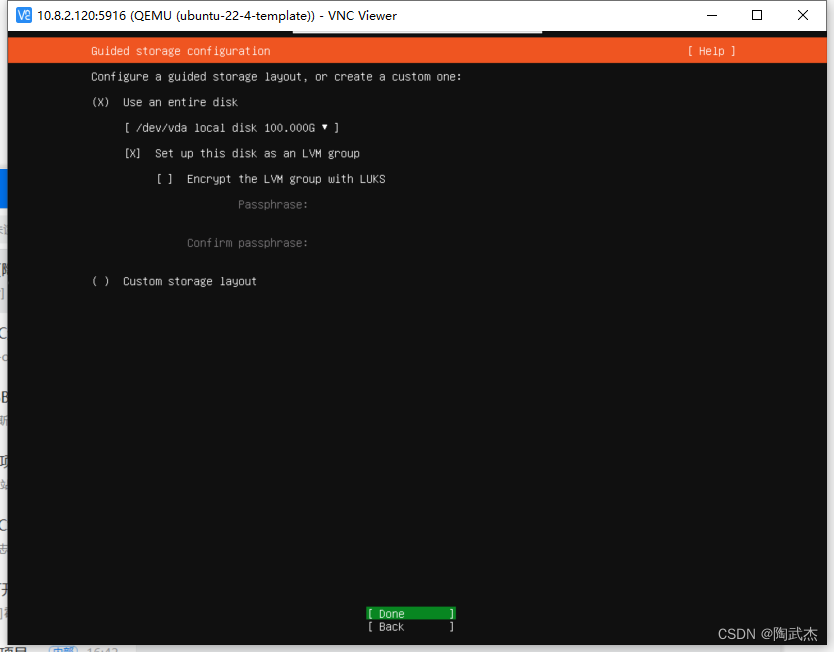
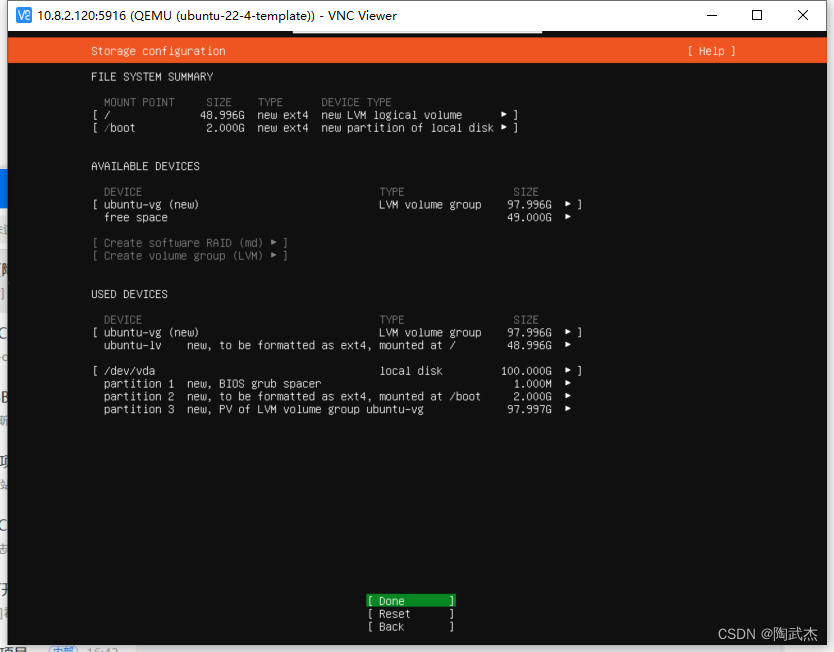
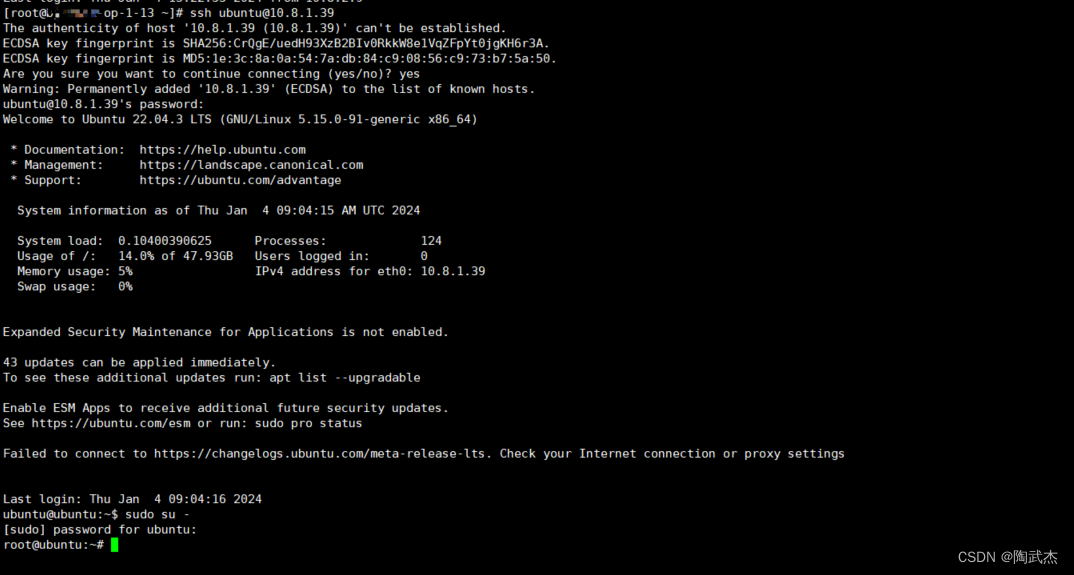
用户与远程ssh
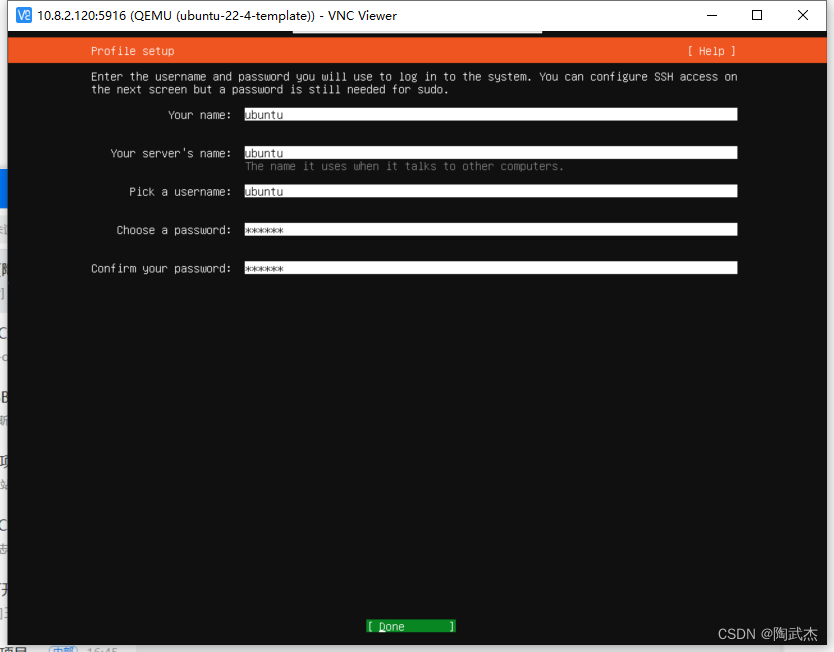
虚拟机创建后,启动虚拟机

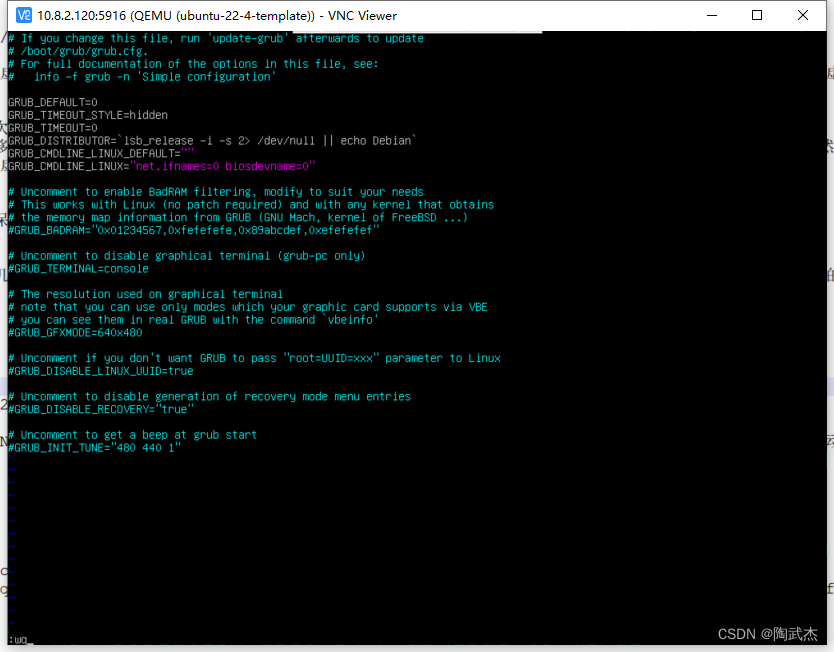
永久修改虚拟机网卡eth0

4. kvm虚拟机模板初始化
4.1. 基础配置(含禁用系统更新):
# 关闭系统更新
sed -i 's#1#0#g' /etc/apt/apt.conf.d/20auto-upgrades
sed -i 's#1#0#g' /etc/apt/apt.conf.d/10periodic

# 修改系统限制
echo "ulimit -SHn 102400" >> /etc/rc.local
cat >> /etc/security/limits.conf << EOF
* soft nofile 65535
* hard nofile 65535
* soft nproc 65535
* hard nproc 65535
EOF

# 配置历史命令优化
cat >> /etc/profile.d/history.sh << EOF
export HISTTIMEFORMAT=" %F %T `whoami` "
export HISTSIZE=100000
export HISTFILESIZE=1000000
EOF


sed -i "/^HISTSIZE=/c\HISTSIZE=100000" ~/.bashrc
sed -i "/^HISTFILESIZE=/c\HISTFILESIZE=1000000" ~/.bashrc
source /etc/profile
source ~/.bashrc

# 优化系统内核
cat >> /etc/sysctl.conf << EOF
# 修改swap级别
vm.swappiness = 1
#关闭ipv6
net.ipv6.conf.all.disable_ipv6 = 1
net.ipv6.conf.default.disable_ipv6 = 1
# 避免放大攻击
net.ipv4.icmp_echo_ignore_broadcasts = 1
# 开启恶意icmp错误消息保护
net.ipv4.icmp_ignore_bogus_error_responses = 1
#关闭路由转发
net.ipv4.ip_forward = 0
net.ipv4.conf.all.send_redirects = 0
net.ipv4.conf.default.send_redirects = 0
#开启反向路径过滤
net.ipv4.conf.all.rp_filter = 1
net.ipv4.conf.default.rp_filter = 1
#处理无源路由的包
net.ipv4.conf.all.accept_source_route = 0
net.ipv4.conf.default.accept_source_route = 0

#关闭sysrq功能
kernel.sysrq = 0
#core文件名中添加pid作为扩展名
kernel.core_uses_pid = 1
# 开启SYN洪水攻击保护
net.ipv4.tcp_syncookies = 1
#修改消息队列长度
kernel.msgmnb = 65536
kernel.msgmax = 65536

#设置最大内存共享段大小bytes
kernel.shmmax = 68719476736
kernel.shmall = 4294967296
#timewait的数量,默认180000
net.ipv4.tcp_max_tw_buckets = 6000
net.ipv4.tcp_sack = 1
net.ipv4.tcp_window_scaling = 1
net.ipv4.tcp_rmem = 4096 87380 4194304
net.ipv4.tcp_wmem = 4096 16384 4194304
net.core.wmem_default = 8388608
net.core.rmem_default = 8388608
net.core.rmem_max = 16777216
net.core.wmem_max = 16777216

#每个网络接口接收数据包的速率比内核处理这些包的速率快时,允许送到队列的数据包的最大数目
net.core.netdev_max_backlog = 262144
#限制仅仅是为了防止简单的DoS 攻击
net.ipv4.tcp_max_orphans = 3276800
#未收到客户端确认信息的连接请求的最大值
net.ipv4.tcp_max_syn_backlog = 262144
net.ipv4.tcp_timestamps = 0
#内核放弃建立连接之前发送SYNACK 包的数量
net.ipv4.tcp_synack_retries = 1
#内核放弃建立连接之前发送SYN 包的数量
net.ipv4.tcp_syn_retries = 1
#启用timewait 快速回收
net.ipv4.tcp_tw_recycle = 1
#开启重用。允许将TIME-WAIT sockets 重新用于新的TCP 连接
net.ipv4.tcp_tw_reuse = 1
net.ipv4.tcp_mem = 94500000 915000000 927000000
net.ipv4.tcp_fin_timeout = 1
#当keepalive 起用的时候,TCP 发送keepalive 消息的频度。缺省是2 小时
net.ipv4.tcp_keepalive_time = 30
#允许系统打开的端口范围
net.ipv4.ip_local_port_range = 1024 65000
EOF

sysctl -p


# 修改ssh
echo "HostKeyAlgorithms +ssh-rsa,ssh-dss" >> /etc/ssh/sshd_config
echo "KexAlgorithms +diffie-hellman-group-exchange-sha256,diffie-hellman-group1-sha1" >> /etc/ssh/sshd_config
echo "PubkeyAuthentication yes" >> /etc/ssh/sshd_config
echo "PermitRootLogin yes" >> /etc/ssh/sshd_config
echo "UseDNS no" >> /etc/ssh/sshd_config
sed -i "/^PasswordAuthentication/c\PasswordAuthentication yes" /etc/ssh/sshd_config
rm -f /etc/ssh/sshd_config.d/50-cloud-init.conf
service sshd restart

# 添加密码
echo "root:ubuntu-k8s@2023" |chpasswd

# reboot 重启,使关闭系统更新生效
reboot
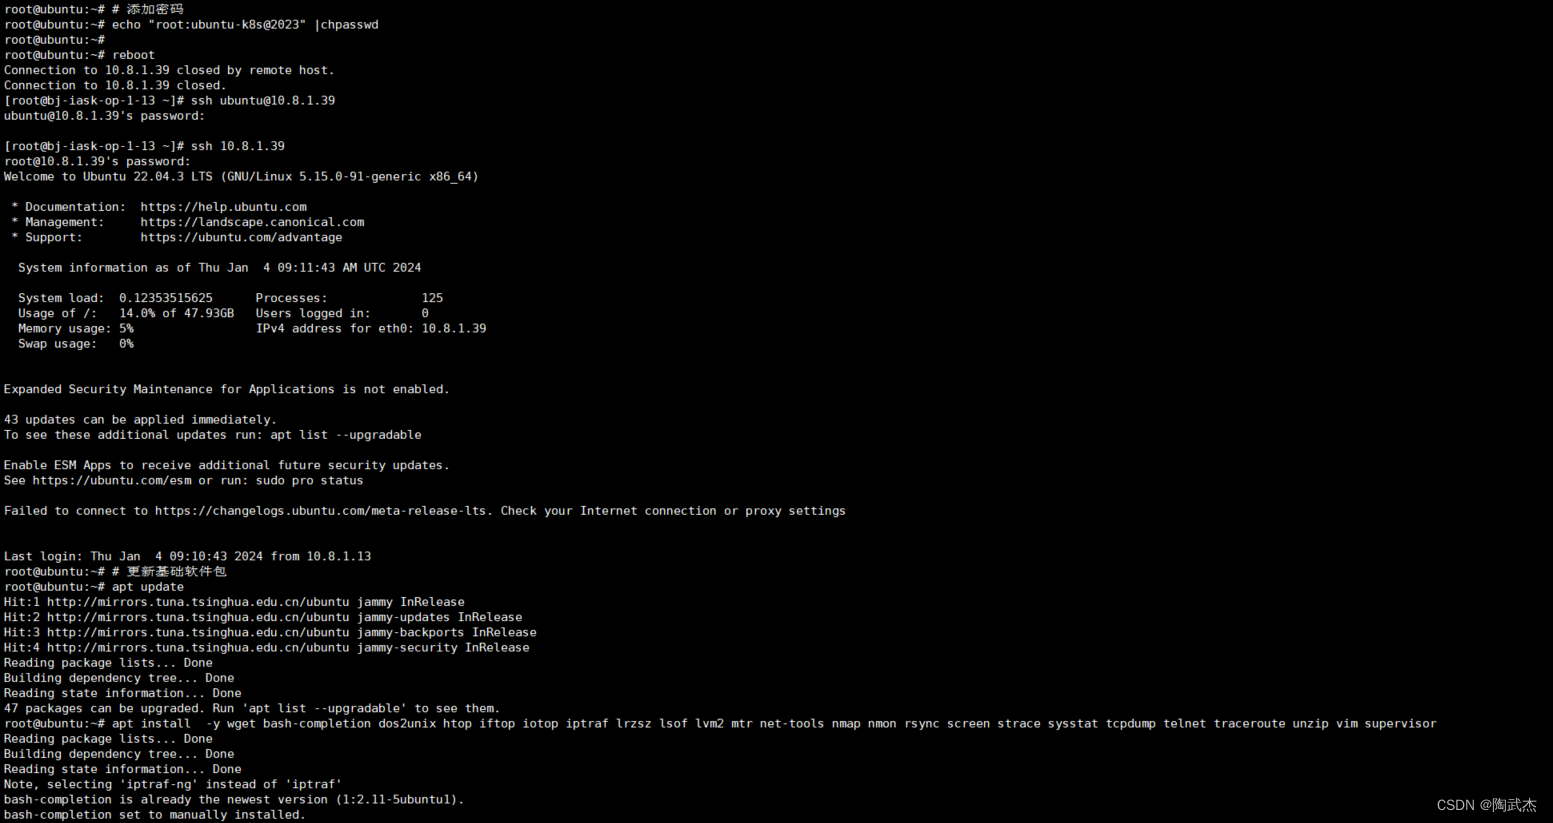
4.2 更新软件包:
# 更新基础软件包
apt update
apt install  -y wget bash-completion dos2unix htop iftop iotop iptraf lrzsz lsof lvm2 mtr net-tools nmap nmon rsync screen strace sysstat tcpdump telnet traceroute unzip vim supervisor
4.3 优化virsh console登录:
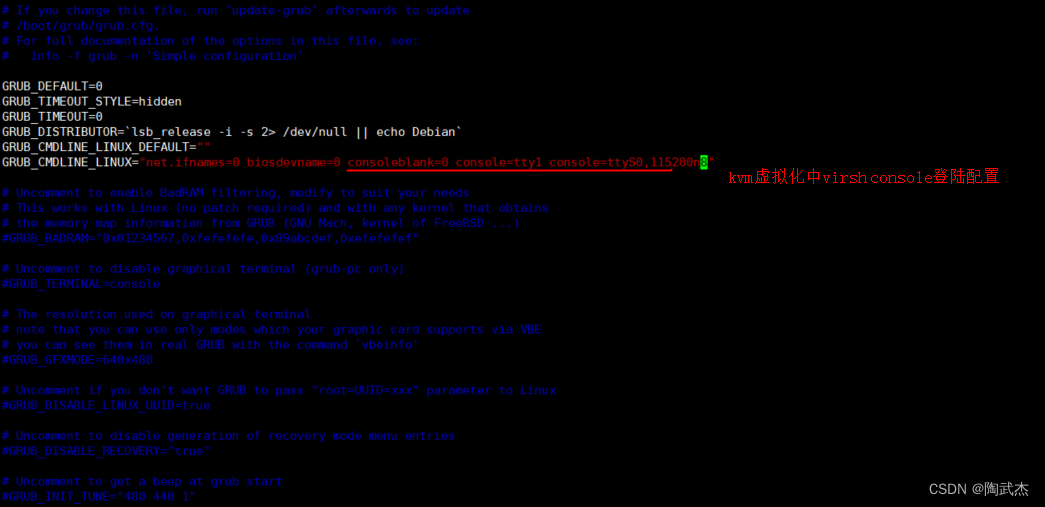
virsh 卡屏,无法正常使用

方案:
GRUB_CMDLINE_LINUX=“net.ifnames=0 biosdevname=0 consoleblank=0 console=tty1 console=ttyS0,115200n8”
root@ubuntu:~# vim /boot/grub/grub.cfg

GRUB_CMDLINE_LINUX="net.ifnames=0 biosdevname=0 consoleblank=0 console=tty1 console=ttyS0,115200n8"
root@ubuntu:~# update-grub
reboot
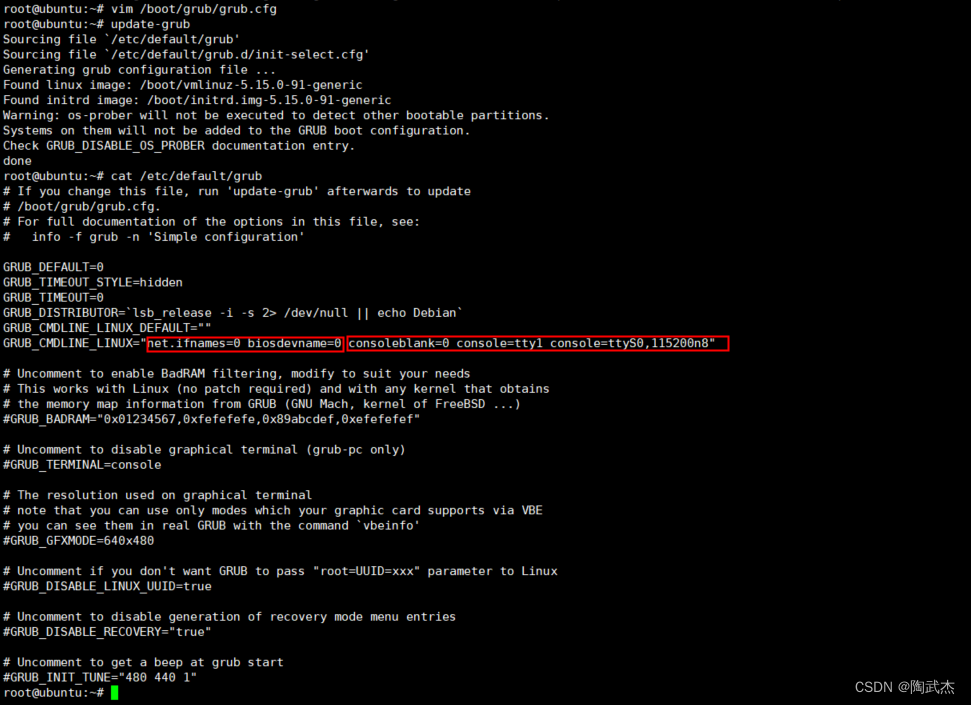
效果:

4.4 优化系统唯一性
4.4.1 machine-id
原理:
配置一个服务,开机网络没有启动前执行命令:systemd-machine-id-setup
先清理machine-id文件,然后使用systemd-machine-id-setup即可初始化新的虚拟机id (关联虚拟机uuid/product_uuid 唯一性见下文)
root@k8s-master01-1-40:~# rm /etc/machine-id
root@k8s-master01-1-40:~# systemd-machine-id-setup
Initializing machine ID from VM UUID.

PS: 没有machine-id网络无法启动
配置systemd-machine-id-setup服务:
cat >> /etc/systemd/system/machine-id-setup.service << EOF
[Unit]
Description=Initializing machine ID from VM UUID.
Documentation=man:systemd-machine-id-commit.service(8)
DefaultDependencies=no
Conflicts=shutdown.target
Before=shutdown.target
After=local-fs.target first-boot-complete.target[Service]
Type=oneshot
RemainAfterExit=yes
ExecStart=systemd-machine-id-setup
TimeoutSec=30s[Install]
WantedBy=multi-user.target
EOFsystemctl daemon-reload
systemctl enable machine-id-setup.servicerm -f /etc/machine-id
sync
init 0
systemd自带的systemd-machine-id-setup-commit 服务无法实现初始化machine-id功能,为了方便需要新增一个服务
root@ubuntu:~# cat >> /etc/systemd/system/machine-id-setup.service << EOF
> [Unit]
> Description=Initializing machine ID from VM UUID.
> Documentation=man:systemd-machine-id-commit.service(8)
> DefaultDependencies=no
> Conflicts=shutdown.target
> Before=shutdown.target
> After=local-fs.target first-boot-complete.target
>
> [Service]
> Type=oneshot
> RemainAfterExit=yes
> ExecStart=systemd-machine-id-setup
> TimeoutSec=30s
>
> [Install]
> WantedBy=multi-user.target
> EOF

root@ubuntu:~# systemctl daemon-reload
root@ubuntu:~# systemctl enable machine-id-setup.service
Created symlink /etc/systemd/system/multi-user.target.wants/machine-id-setup.service → /etc/systemd/system/machine-id-setup.service.
root@ubuntu:~#  rm -f /etc/machine-id
root@ubuntu:~#  init 0
4.4.2 product_uuid
方案: product_uuid 由虚拟化平台生成,kvm虚拟化注册虚拟机需要使用xml,将模板xml中的uuid手动变更,或删除使uuid自动生成即可保障product_uuid唯一性
验证: cat /sys/class/dmi/id/product_uuid
4.4.3 网卡MAC UUID
方案:使用virsh命令每次都attach一个新的网卡,系统回自动分配一个新的MAC uuid等信息。
验证:能登陆,网络通则MAC 唯一性
5. 基于模板虚拟机方案:
基于虚拟机模板创建虚拟机 两种方案:
- 克隆
- virt-clone -o oeltest01 -n oeltest02 -f /data/test02.img --auto-clone
- 复制磁盘,重新注册
- cp qcow2 / vim xml / virsh define xml
本次我们采用复制文件的方式,基于虚拟机模板新建虚拟机。
规范:
虚拟机工作目录:   /data |data01 |data_ssd |...
虚拟机模板目录:  /data/vm/template/xxx.qcow2 | xml
虚拟机磁盘:  /data/vm/xxx虚拟机名称/虚拟机.qcow2   系统盘
虚拟机磁盘:  /data/vm/虚拟机名称/虚拟机-data.qcow2   data盘
虚拟机初始配置: /data/vm/xxx虚拟机名称/虚拟机.xml  最初配置
虚拟机创建脚本目录: /data/scripts/
5.1 创建xml文件:
[root@bj-test-kvm-2-120 template]# virsh dumpxml ubuntu-22-4-template > /data/vm/template/template-ubuntu.xml
[root@bj-test-kvm-2-120 template]# vim /data/vm/template/template-ubuntu.xml
5.2 修改模板xml,优化脚本化配置


5.2.1 xml配置模板:
[root@bj-test-kvm-2-120 ~]# cat /data/vm/template/template-ubuntu.xml
<domain type='kvm' id='2'>
  <name>Virt-Name</name>
  <memory unit='KiB'>4194304</memory>
  <currentMemory unit='KiB'>4194304</currentMemory>
  <vcpu placement='static'>4</vcpu>
  <resource>
    <partition>/machine</partition>
  </resource>
  <os>
    <type arch='x86_64' machine='pc-i440fx-rhel7.0.0'>hvm</type>
    <boot dev='hd'/>
  </os>
  <features>
    <acpi/>
    <apic/>
  </features>
  <cpu mode='custom' match='exact' check='full'>
    <model fallback='forbid'>Haswell-IBRS</model>
    <feature policy='disable' name='md-clear'/>
    <feature policy='require' name='ssbd'/>
    <feature policy='disable' name='hle'/>
    <feature policy='disable' name='rtm'/>
    <feature policy='require' name='spec-ctrl'/>
    <feature policy='require' name='hypervisor'/>
    <feature policy='require' name='xsaveopt'/>
  </cpu>
  <clock offset='utc'>
    <timer name='rtc' tickpolicy='catchup'/>
    <timer name='pit' tickpolicy='delay'/>
    <timer name='hpet' present='no'/>
  </clock>
  <on_poweroff>destroy</on_poweroff>
  <on_reboot>restart</on_reboot>
  <on_crash>destroy</on_crash>
  <pm>
    <suspend-to-mem enabled='no'/>
    <suspend-to-disk enabled='no'/>
  </pm>
  <devices>
    <emulator>/usr/libexec/qemu-kvm</emulator>
    <disk type='file' device='disk'>
      <driver name='qemu' type='qcow2'/>
      <source file='/data/vm/Virt-Name/Virt-Name.qcow2'/>
      <backingStore/>
      <target dev='vda' bus='virtio'/>
      <alias name='virtio-disk0'/>
      <address type='pci' domain='0x0000' bus='0x00' slot='0x05' function='0x0'/>
    </disk>
    <disk type='file' device='cdrom'>
      <driver name='qemu'/>
      <target dev='hda' bus='ide'/>
      <readonly/>
      <alias name='ide0-0-0'/>
      <address type='drive' controller='0' bus='0' target='0' unit='0'/>
    </disk>
    <controller type='usb' index='0' model='ich9-ehci1'>
      <alias name='usb'/>
      <address type='pci' domain='0x0000' bus='0x00' slot='0x04' function='0x7'/>
    </controller>
    <controller type='usb' index='0' model='ich9-uhci1'>
      <alias name='usb'/>
      <master startport='0'/>
      <address type='pci' domain='0x0000' bus='0x00' slot='0x04' function='0x0' multifunction='on'/>
    </controller>
    <controller type='usb' index='0' model='ich9-uhci2'>
      <alias name='usb'/>
      <master startport='2'/>
      <address type='pci' domain='0x0000' bus='0x00' slot='0x04' function='0x1'/>
    </controller>
    <controller type='usb' index='0' model='ich9-uhci3'>
      <alias name='usb'/>
      <master startport='4'/>
      <address type='pci' domain='0x0000' bus='0x00' slot='0x04' function='0x2'/>
    </controller>
    <controller type='pci' index='0' model='pci-root'>
      <alias name='pci.0'/>
    </controller>
    <controller type='ide' index='0'>
      <alias name='ide'/>
      <address type='pci' domain='0x0000' bus='0x00' slot='0x01' function='0x1'/>
    </controller>
    <!--
    <interface type='bridge'>
      <mac address='52:54:00:ac:6f:d0'/>
      <source bridge='iask-lan'/>
      <target dev='vnet0'/>
      <model type='virtio'/>
      <alias name='net0'/>
      <address type='pci' domain='0x0000' bus='0x00' slot='0x03' function='0x0'/>
    </interface>
    -->
    <serial type='pty'>
      <source path='/dev/pts/1'/>
      <target type='isa-serial' port='0'>
        <model name='isa-serial'/>
      </target>
      <alias name='serial0'/>
    </serial>
    <console type='pty' tty='/dev/pts/1'>
      <source path='/dev/pts/1'/>
      <target type='serial' port='0'/>
      <alias name='serial0'/>
    </console>
    <input type='tablet' bus='usb'>
      <alias name='input0'/>
      <address type='usb' bus='0' port='1'/>
    </input>
    <input type='mouse' bus='ps2'>
      <alias name='input1'/>
    </input>
    <input type='keyboard' bus='ps2'>
      <alias name='input2'/>
    </input>
    <!--
    <graphics type='vnc' port='5916' autoport='no' listen='0.0.0.0'>
      <listen type='address' address='0.0.0.0'/>
    </graphics>
    -->
    <video>
      <model type='cirrus' vram='16384' heads='1' primary='yes'/>
      <alias name='video0'/>
      <address type='pci' domain='0x0000' bus='0x00' slot='0x02' function='0x0'/>
    </video>
    <memballoon model='virtio'>
      <alias name='balloon0'/>
      <address type='pci' domain='0x0000' bus='0x00' slot='0x06' function='0x0'/>
    </memballoon>
  </devices>
  <seclabel type='dynamic' model='dac' relabel='yes'>
    <label>+107:+107</label>
    <imagelabel>+107:+107</imagelabel>
  </seclabel>
</domain>
5.2 创建启动脚本
一个简单的脚本实现虚拟机磁盘文件创建,虚拟机注册,初始化等工作。
[root@bj-test-kvm-2-120 scripts]# cat create-ubuntu-vm.sh
#!/bin/bash

set -e
mkdir -p /data/vm/xml/
mkdir -p /mnt/kvm/

read  -p "请输入虚拟机名:" HOST_NAME
echo -e "\n"

read  -p "请输入ip地址:" IP
echo -e "\n"

    XML=$HOST_NAME.xml
    network_conf=/mnt/kvm//$HOST_NAME/etc/sysconfig/network-scripts/ifcfg-eth0
    hosts_conf=/mnt/kvm//$HOST_NAME/etc/hosts
    #ssh_conf=/mnt/kvm//$HOST_NAME/etc/ssh/sshd_config
    #zabbix_conf=/mnt/kvm//$HOST_NAME/etc/zabbix/zabbix_agent.conf

    echo 正在初始化$HOST_NAME.....
    if [ ! -f /data/vm/$HOST_NAME.qcow2 ] ;then
            echo 正在同步系统镜像
            mkdir -p /data/vm/$HOST_NAME/
            echo rsync -v /data/vm/template/ubuntu-22-4-template.qcow2 /data/vm/$HOST_NAME/$HOST_NAME.qcow2
            rsync -v /data/vm/template/ubuntu-22-4-template.qcow2 /data/vm/$HOST_NAME/$HOST_NAME.qcow2
    else
            echo "虚拟机磁盘文件存在,请检查,正在退出系统...."
            exit 100
    fi
    echo 正在配置xml配置
    cp /data/vm/template/template-ubuntu.xml /data/vm/xml/$XML

    sed -i "s#Virt-Name#$HOST_NAME#g" /data/vm/xml/$XML
    echo 定义虚拟机
    virsh define /data/vm/xml/$XML
    echo 正在初始化系统
    mkdir -p /mnt/kvm/$HOST_NAME
    if mount | grep -q "/mnt/kvm/$HOST_NAME" ;then
    umount /mnt/kvm/$HOST_NAME
    fi
    guestmount  -d $HOST_NAME -i /mnt/kvm/$HOST_NAME

      echo "$HOST_NAME" >  /mnt/kvm/$HOST_NAME/etc/hostname
      echo -e "# 主机名 \n  $IP $HOST_NAME" >> /mnt/kvm/$HOST_NAME/etc/hosts
	  sed -i "s#10.8.1.39#$IP#g" /mnt/kvm/$HOST_NAME/etc/netplan/00-installer-config.yaml

	  # Centos规范配置
      #sed -i '/^UUID=/d' /mnt/kvm/$HOST_NAME/etc/sysconfig/network-scripts/ifcfg-eth0
      #sed -i "/^IPADDR=/c\IPADDR=$IP" /mnt/kvm/$HOST_NAME/etc/sysconfig/network-scripts/ifcfg-eth0
      #sed -i "/^ONBOOT=/c\ONBOOT=yes" /mnt/kvm/$HOST_NAME/etc/sysconfig/network-scripts/ifcfg-eth0
      #sed -i "s#Port\ 10086#Port 22#g"  /mnt/kvm/$HOST_NAME/etc/ssh/sshd_config
      #sed -i "/^ListenAddress /c\ListenAddress $IP" /mnt/kvm/$HOST_NAME/etc/ssh/sshd_config
      #sed -i "s#GSSAPIAuthentication#\#GSSAPIAuthentication#g"  /mnt/kvm/$HOST_NAME/etc/ssh/sshd_config
      #sed -i "s#GSSAPICleanupCredentials#\#GSSAPICleanupCredentials#g" /mnt/kvm//$HOST_NAME/etc/ssh/sshd_config
      #sed -i "/^Hostname=/c\Hostname=$HOST_NAME" /mnt/kvm/$HOST_NAME/etc/zabbix/zabbix_agentd.conf
      #sed -i "/^Server=/c\Server=10.8.2.14,10.8.1.12" /mnt/kvm/$HOST_NAME/etc/zabbix/zabbix_agentd.conf
      #sed -i "/^ListenIP=/c\ListenIP=$IP" /mnt/kvm//$HOST_NAME/etc/zabbix/zabbix_agentd.conf
      #sed -i "/^ServerActive=/c\ServerActive=10.8.2.14,10.8.1.12" /mnt/kvm/$HOST_NAME/etc/zabbix/zabbix_agentd.conf

    umount -f /mnt/kvm/$HOST_NAME
    rm -r /mnt/kvm/$HOST_NAME
    echo 正在配置网卡
    virsh attach-interface $HOST_NAME bridge iask-lan --model virtio --config

    if [ ! -f /data/vm/$HOST_NAME-data.qcow2 ] ;then
            echo 正在创建数据盘
            qemu-img create -f qcow2 /data/vm/$HOST_NAME/$HOST_NAME-data.qcow2 100G
            virsh attach-disk $HOST_NAME /data/vm/$HOST_NAME/$HOST_NAME-data.qcow2 vdb --subdriver=qcow2 --config
    else
            echo "已经存在数据盘文件,请手动挂载!!!"
    fi
    virsh start $HOST_NAME
6. 创建虚拟机测试
6.1 创建虚拟机全流程:
[root@bj-test-kvm-2-120 scripts]# bash create-ubuntu-vm.sh
请输入虚拟机名:k8s-master01-1-40


请输入ip地址:10.8.1.140


正在初始化k8s-master01-1-40.....
正在同步系统镜像
rsync -v /data/vm/template/ubuntu-22-4-template.qcow2 /data/vm/k8s-master01-1-40/k8s-master01-1-40.qcow2
ubuntu-22-4-template.qcow2

sent 6,516,065,553 bytes  received 35 bytes  420,391,328.26 bytes/sec
total size is 6,514,475,008  speedup is 1.00
正在配置xml配置
cp: cannot stat ‘/data/vm/template/template.xml’: No such file or directory
[root@bj-test-kvm-2-120 scripts]# vim create-ubuntu-vm.sh
[root@bj-test-kvm-2-120 scripts]# bash create-ubuntu-vm.sh
请输入虚拟机名:k8s-master01-1-40


请输入ip地址:10.8.1.140


正在初始化k8s-master01-1-40.....
正在同步系统镜像
rsync -v /data/vm/template/ubuntu-22-4-template.qcow2 /data/vm/k8s-master01-1-40/k8s-master01-1-40.qcow2
ubuntu-22-4-template.qcow2

sent 6,516,065,554 bytes  received 35 bytes  394,913,066.00 bytes/sec
total size is 6,514,475,008  speedup is 1.00
正在配置xml配置
定义虚拟机
Domain k8s-master01-1-40 defined from /data/vm/xml/k8s-master01-1-40.xml

正在初始化系统
正在配置网卡
Interface attached successfully

正在创建数据盘
Formatting '/data/vm/k8s-master01-1-40/k8s-master01-1-40-data.qcow2', fmt=qcow2 size=107374182400 encryption=off cluster_size=65536 lazy_refcounts=off
Disk attached successfully

Domain k8s-master01-1-40 started

[root@bj-test-kvm-2-120 scripts]# virsh list
 Id    Name                           State
----------------------------------------------------
 2     ubuntu-22-4-template           running
 4     k8s-master01-1-40              running
[root@bj-test-kvm-2-120 scripts]# ping -c2 10.8.1.40
PING 10.8.1.40 (10.8.1.40) 56(84) bytes of data.
64 bytes from 10.8.1.40: icmp_seq=1 ttl=63 time=0.588 ms
64 bytes from 10.8.1.40: icmp_seq=2 ttl=63 time=0.515 ms

--- 10.8.1.40 ping statistics ---
2 packets transmitted, 2 received, 0% packet loss, time 1050ms
rtt min/avg/max/mdev = 0.515/0.551/0.588/0.043 ms
[root@bj-test-kvm-2-120 scripts]# virsh console 4
Connected to domain k8s-master01-1-40
Escape character is ^]

k8s-master01-1-40 login: root
Password:
Welcome to Ubuntu 22.04.3 LTS (GNU/Linux 5.15.0-91-generic x86_64)

 * Documentation:  https://help.ubuntu.com
 * Management:     https://landscape.canonical.com
 * Support:        https://ubuntu.com/advantage

  System information as of Thu Jan  4 11:34:55 AM UTC 2024

  System load:  0.0                Processes:             118
  Usage of /:   14.3% of 47.93GB   Users logged in:       0
  Memory usage: 5%                 IPv4 address for eth0: 10.8.1.40
  Swap usage:   0%


Expanded Security Maintenance for Applications is not enabled.

41 updates can be applied immediately.
To see these additional updates run: apt list --upgradable

1 additional security update can be applied with ESM Apps.
Learn more about enabling ESM Apps service at https://ubuntu.com/esm

Failed to connect to https://changelogs.ubuntu.com/meta-release-lts. Check your Internet connection or proxy settings


Last login: Thu Jan  4 11:31:20 UTC 2024 on ttyS0
root@k8s-master01-1-40:~#
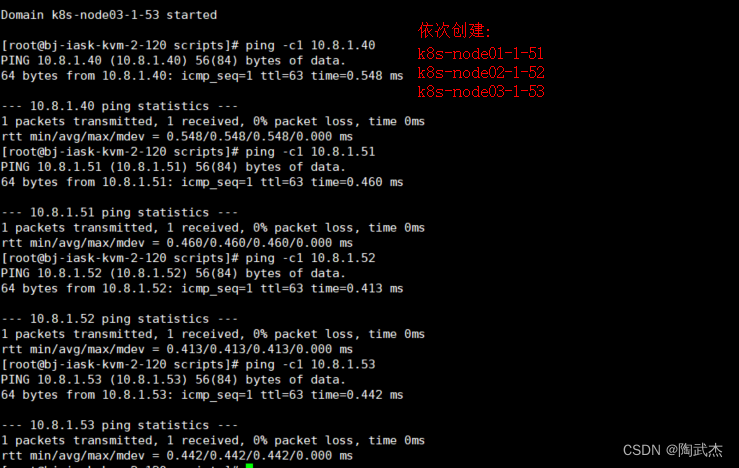
6.2 验证系统唯一性:
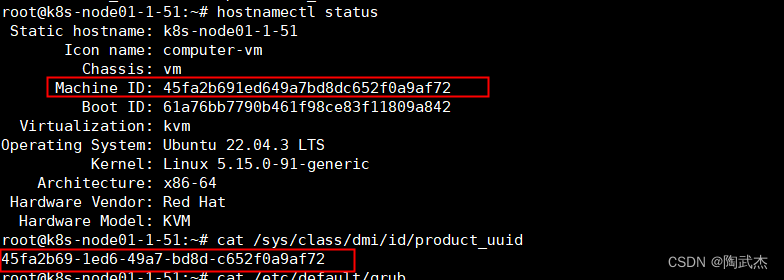

6.3 批量验证虚拟机唯一性
6.3.1 配置免密/安装ansible
root@k8s-master01-1-40:~# ssh-keygen
Generating public/private rsa key pair.
Enter file in which to save the key (/root/.ssh/id_rsa): Enter passphrase (empty for no passphrase):
Enter same passphrase again:
Your identification has been saved in /root/.ssh/id_rsa
Your public key has been saved in /root/.ssh/id_rsa.pub
The key fingerprint is:
SHA256:KNtJrR9sNjyeiFmoqkh2+852S2jQVWXl4e1VJaiF9qA root@k8s-master01-1-40
The key's randomart image is:
+---[RSA 3072]----+
|         ..+.+. +|
|        . = = o..|
|       . o = o ..|
|    . .oE . . . .|
|   ...o S      . |
|    .*.=         |
| o .oo=.O        |
|+ ..+=.B =       |
|=...*+o.=        |
+----[SHA256]-----+

root@k8s-master01-1-40:~# ssh-copy-id 10.8.1.40
/usr/bin/ssh-copy-id: INFO: Source of key(s) to be installed: "/root/.ssh/id_rsa.pub"
The authenticity of host '10.8.1.40 (10.8.1.40)' can't be established.
ED25519 key fingerprint is SHA256:XbvhDhi7HnPdOpFGcpBwMGIZucOQfBMGBwvjwRna/qo.
This key is not known by any other names
Are you sure you want to continue connecting (yes/no/[fingerprint])? yes
/usr/bin/ssh-copy-id: INFO: attempting to log in with the new key(s), to filter out any that are already installed
/usr/bin/ssh-copy-id: INFO: 1 key(s) remain to be installed -- if you are prompted now it is to install the new keys
root@10.8.1.40's password:

Number of key(s) added: 1

Now try logging into the machine, with:   "ssh '10.8.1.40'"
and check to make sure that only the key(s) you wanted were added.

root@k8s-master01-1-40:~# ssh-copy-id 10.8.1.51
root@k8s-master01-1-40:~# ssh-copy-id 10.8.1.52
root@k8s-master01-1-40:~# ssh-copy-id 10.8.1.53
root@k8s-master01-1-40:~# apt update && apt install -y ansible

root@k8s-master01-1-40:~# mkdir -p /etc/ansible
root@k8s-master01-1-40:~# cat /etc/ansible/hosts
[all]
10.8.1.40
10.8.1.51
10.8.1.52
10.8.1.53
root@k8s-master01-1-40:~# ansible all -m ping
10.8.1.40 | SUCCESS => {
    "ansible_facts": {
        "discovered_interpreter_python": "/usr/bin/python3"
    },
    "changed": false,
    "ping": "pong"
}
10.8.1.53 | SUCCESS => {
    "ansible_facts": {
        "discovered_interpreter_python": "/usr/bin/python3"
    },
    "changed": false,
    "ping": "pong"
}
10.8.1.52 | SUCCESS => {
    "ansible_facts": {
        "discovered_interpreter_python": "/usr/bin/python3"
    },
    "changed": false,
    "ping": "pong"
}
10.8.1.51 | SUCCESS => {
    "ansible_facts": {
        "discovered_interpreter_python": "/usr/bin/python3"
    },
    "changed": false,
    "ping": "pong"
}
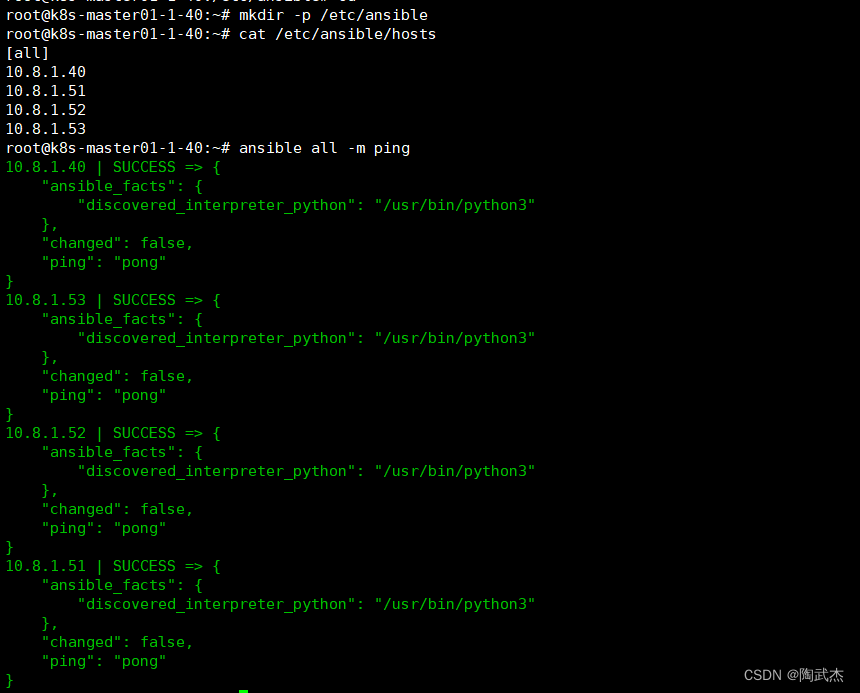
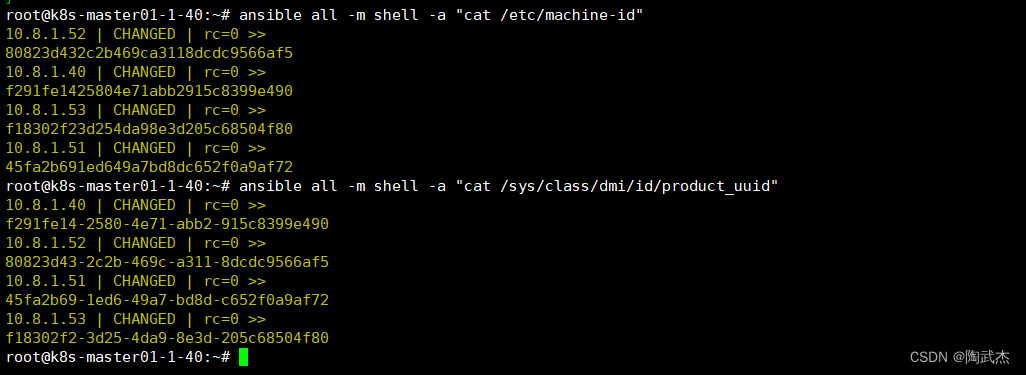
6.3.2 查看对比 machine-id/product_uuid
root@k8s-master01-1-40:~# ansible all -m shell -a "cat /etc/machine-id"
10.8.1.52 | CHANGED | rc=0 >>
80823d432c2b469ca3118dcdc9566af5
10.8.1.40 | CHANGED | rc=0 >>
f291fe1425804e71abb2915c8399e490
10.8.1.53 | CHANGED | rc=0 >>
f18302f23d254da98e3d205c68504f80
10.8.1.51 | CHANGED | rc=0 >>
45fa2b691ed649a7bd8dc652f0a9af72
root@k8s-master01-1-40:~# ansible all -m shell -a "cat /sys/class/dmi/id/product_uuid"
10.8.1.40 | CHANGED | rc=0 >>
f291fe14-2580-4e71-abb2-915c8399e490
10.8.1.52 | CHANGED | rc=0 >>
80823d43-2c2b-469c-a311-8dcdc9566af5
10.8.1.51 | CHANGED | rc=0 >>
45fa2b69-1ed6-49a7-bd8d-c652f0a9af72
10.8.1.53 | CHANGED | rc=0 >>
f18302f2-3d25-4da9-8e3d-205c68504f80
root@k8s-master01-1-40:~# ansible all -m shell -a "hostnamectl status"
10.8.1.53 | CHANGED | rc=0 >>
 Static hostname: k8s-node03-1-53
       Icon name: computer-vm
         Chassis: vm
      Machine ID: f18302f23d254da98e3d205c68504f80
         Boot ID: f1837e41dc704008ba3e6514abe3b2d3
  Virtualization: kvm
Operating System: Ubuntu 22.04.3 LTS
          Kernel: Linux 5.15.0-91-generic
    Architecture: x86-64
 Hardware Vendor: Red Hat
  Hardware Model: KVM
10.8.1.52 | CHANGED | rc=0 >>
 Static hostname: k8s-node02-1-52
       Icon name: computer-vm
         Chassis: vm
      Machine ID: 80823d432c2b469ca3118dcdc9566af5
         Boot ID: 9f5d0f22b3ea4146a3d517ee6ad56aa1
  Virtualization: kvm
Operating System: Ubuntu 22.04.3 LTS
          Kernel: Linux 5.15.0-91-generic
    Architecture: x86-64
 Hardware Vendor: Red Hat
  Hardware Model: KVM
10.8.1.40 | CHANGED | rc=0 >>
 Static hostname: k8s-master01-1-40
       Icon name: computer-vm
         Chassis: vm
      Machine ID: f291fe1425804e71abb2915c8399e490
         Boot ID: 733de2f860444a909c2aa4bc6ccd20da
  Virtualization: kvm
Operating System: Ubuntu 22.04.3 LTS
          Kernel: Linux 5.15.0-91-generic
    Architecture: x86-64
 Hardware Vendor: Red Hat
  Hardware Model: KVM
10.8.1.51 | CHANGED | rc=0 >>
 Static hostname: k8s-node01-1-51
       Icon name: computer-vm
         Chassis: vm
      Machine ID: 45fa2b691ed649a7bd8dc652f0a9af72
         Boot ID: 61a76bb7790b461f98ce83f11809a842
  Virtualization: kvm
Operating System: Ubuntu 22.04.3 LTS
          Kernel: Linux 5.15.0-91-generic
    Architecture: x86-64
 Hardware Vendor: Red Hat
  Hardware Model: KVM
7. 总结
本次主要是使用kvm虚拟化创建初始化了ubuntu22.04虚拟机,并使用硬盘文件拷贝重新注册的方式实现了虚拟机的创建。为了满足特殊分布式集群使用场景,做了虚拟机一致性确认。
7.1 其中涉及的技术点有:
-
ubuntu 禁用系统更新 # 个人习惯关闭更新,不然软件和内核会更新
-
guestmount 挂载虚拟机磁盘,修改虚拟机文件
-
virsh attach-interface 命令添加网卡,底层修改mac地址网卡uuid,保障网卡mac uuid
唯一性 -
virsh xml 文件移除uuid字段,define系统重新生成,保障product_uuid的
唯一性 -
systemd-machine-id-setup 命令更新初始化machine-id 的
唯一性
7.2 唯一性几个值信息:
- product_uuid
- machine-id
- 网卡 mac/uuid
7.3 唯一性涉及命令:
hostnamectl status
cat /etc/machine-id
cat /sys/class/dmi/id/product_uuid
nmcli d s / ip a  # 查看mac地址 ,mac或uuid相同网络不同,可略
7.4 参考:
7.4.1 product_uuid
vmware 更改或保留已迁移虚拟机的 UUID (1541)
VMWARE:
如果您不知道,请回答“我复制了它” (If you don't know, answer "I copied it")。
取消 (Cancel)
我移动了它 (I moved it)
我复制了它 (I copied it)
如果您移动了此虚拟机,可以选择保留此 UUID。选择保留/我移动了它,然后单击确定继续打开此虚拟机电源。

如果将此虚拟机复制到新位置,应创建一个新 UUID,因为虚拟机的副本会使用与原始虚拟机相同的 UUID。选择创建/我复制了它,然后单击确定继续打开此虚拟机电源。

如果要将原始虚拟机用作更多虚拟机的模板,则可以在首次打开每个副本电源时选择创建新的 UUID。在您配置虚拟机并准备将其用作模板之后,请将其移动到一个新位置,然后打开它的电源。如果在打开虚拟机电源后显示此消息,请选择始终创建,然后单击确定继续打开虚拟机电源。虚拟机设置为在每次移动时都会将创建一个新的 UUID。关闭虚拟机电源,然后通过将虚拟机文件复制到其他位置,开始将其用作模板。

如果您要移动虚拟机很多次,并且要在每次虚拟机移动时保留相同的 UUID,则选择始终保留,然后单击确定继续打开虚拟机电源。

注意:如果要更改始终保留或始终创建设置,请关闭虚拟机电源并编辑其配置文件 (.vmx)。删除包含 uuid.action = "create" 或 uuid.action = "keep" 的行。有关详细信息,请参见 Tips for editing a .vmx file (1714)。
dmidecode -s system-uuid
cat /sys/class/dmi/id/product_uuid
uuidgen
7.4.2 修改eth0:
修改/etc/default/grub配置文件,将GRUB_CMDLINE_LINUX里添加参数改为“net.ifnames=0 biosdevname=0”;
执行update-grub命令重新生成GRUB的启动菜单配置文件

grub-mkconfig -o /boot/grub/grub.cfg
或者
update-grub
7.4.3 网卡配置:
配置文件
root@ubuntu:~# cat /etc/netplan/00-installer-config.yaml
# This is the network config written by 'subiquity'
network:
  ethernets:
    eth0:
      addresses:
      - 10.8.1.39/24
      nameservers:
        addresses:
        - 172.38.100.253
        search: []
      routes:
      - to: default
        via: 10.8.1.247
  version: 2
加载配置命令:
运行以下命令以应用新的网络配置:
sudo netplan apply
打开它的电源。如果在打开虚拟机电源后显示此消息,请选择始终创建,然后单击确定继续打开虚拟机电源。虚拟机设置为在每次移动时都会将创建一个新的 UUID。关闭虚拟机电源,然后通过将虚拟机文件复制到其他位置,开始将其用作模板。

如果您要移动虚拟机很多次,并且要在每次虚拟机移动时保留相同的 UUID,则选择始终保留,然后单击确定继续打开虚拟机电源。

注意:如果要更改始终保留或始终创建设置,请关闭虚拟机电源并编辑其配置文件 (.vmx)。删除包含 uuid.action = "create" 或 uuid.action = "keep" 的行。有关详细信息,请参见 Tips for editing a .vmx file (1714)。
dmidecode -s system-uuid
cat /sys/class/dmi/id/product_uuid
uuidgen
7.4.2 修改eth0:
修改/etc/default/grub配置文件,将GRUB_CMDLINE_LINUX里添加参数改为“net.ifnames=0 biosdevname=0”;
执行update-grub命令重新生成GRUB的启动菜单配置文件

grub-mkconfig -o /boot/grub/grub.cfg
或者
update-grub
7.4.3 网卡配置:
配置文件
root@ubuntu:~# cat /etc/netplan/00-installer-config.yaml
# This is the network config written by 'subiquity'
network:
  ethernets:
    eth0:
      addresses:
      - 10.8.1.39/24
      nameservers:
        addresses:
        - 172.38.100.253
        search: []
      routes:
      - to: default
        via: 10.8.1.247
  version: 2
加载配置命令:
运行以下命令以应用新的网络配置:
sudo netplan apply