uni-app自定义tabBar
目录
一、为什么使用自定义tabBar
目前的业务需求是根据不同的角色展示不同的底部tabBar
二、使用步骤
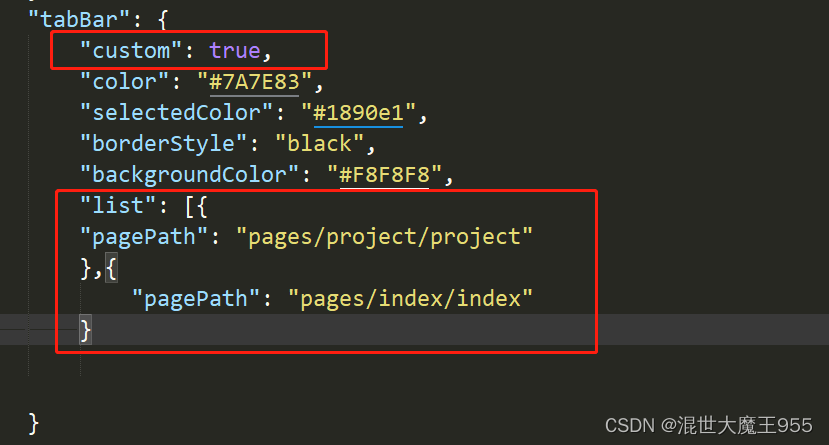
1.修改pages.json文件
开启自定义组件"custom": true,把list里面只留下页面路径

1.封装组件
<template>
	<view class="tab-bar">
		<view class="content">
			<view class="one-tab" v-for="(item, index) in tabBarList" :key="index" @click="selectTabBar(item.pagePath)">
				<view>
					<view class="tab-img">
						<image v-if="routePath === item.pagePath" class="img" :src="item.selectedIconPath"></image>
						<image v-else class="img" :src="item.iconPath"></image>
					</view>
				</view>
				<view v-if="routePath === item.pagePath" class="tit selectTexts">{{ item.text }}</view>
				<view v-else class="tit texts">{{ item.text }}</view>
			</view>
		</view>
	</view>
</template>

<script>
export default {
	props: {
		// 底部导航栏数据
		tabBarList: {
			type: Array,
			required: true
		},
		// 当前页面路径
		routePath: {
			type: String,
			required: true
		}
	},
	data() {
		return {};
	},
	methods: {
		selectTabBar(path) {
			this.$emit('onTabBar', path)
		}
	}
};
</script>

<style lang="scss">
.tab-bar {
	position: fixed;
	bottom: 0;
	left: 0;
	width: 100vw;
	padding-top: 10rpx;
	padding-bottom: calc(10rpx + constant(safe-area-inset-bottom));
	padding-bottom: calc(10rpx + env(safe-area-inset-bottom));
	background-color: #fff;

	.content {
		display: flex;

		.one-tab {
			display: flex;
			flex-direction: column;
			align-items: center;
			width: 50%;

			.tab-img {
				width: 50rpx;
				height: 50rpx;

				.img {
					width: 100%;
					height: 100%;
				}
			}

			.tit {
				font-size: 30rpx;
				transform: scale(0.7);
			}
			.selectTexts{
			color:#1890e1;
			}
			.texts{
				color: block;
			}
		}
	}
}
</style>
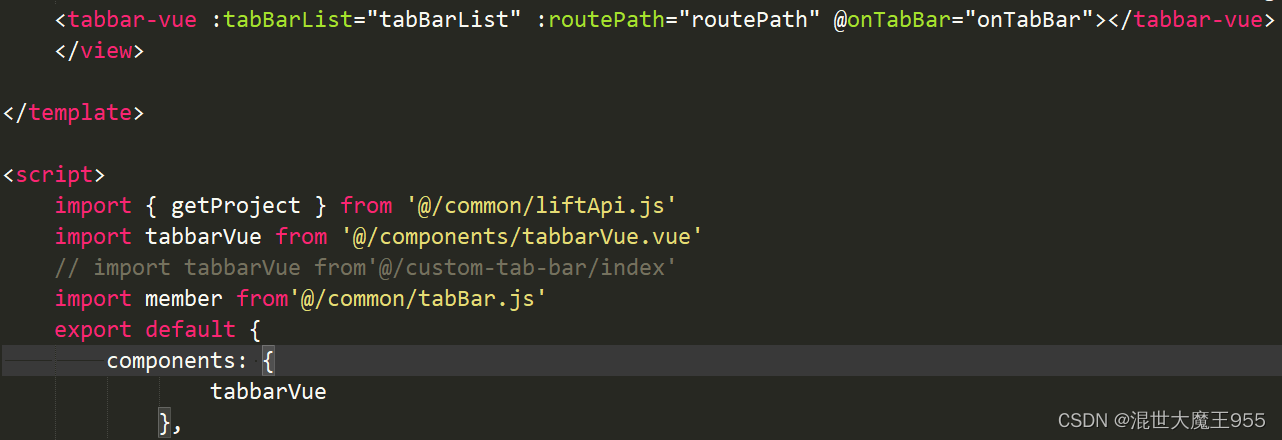
2.tabBar页面引入组件
<tabbar-vue :tabBarList="tabBarList" :routePath="routePath" @onTabBar="onTabBar"></tabbar-vue>
其中tabBarList是底部tabBarList、 routepath是是当前页面的路径、onTabBar是子组件向父组件传递的事件名称
import tabbarVue from '@/components/tabbarVue.vue'引入组件
components: { tabbarVue },注册组件

import member from'@/common/tabBar.js'
common里面定义的不同权限下的tabBar集合
// 管理员
const member = [
	{
				"pagePath": "pages/project/project",
				"iconPath": "/static/default_images/scene.png",
				"selectedIconPath": "/static/default_images/select-scene.png",
				"text": "场景"
			},
			{
				"pagePath": "pages/index/index",
				"iconPath":"/static/default_images/index.png",
				"selectedIconPath":"/static/default_images/select-index.png",
				"text": "我的"
			},
]

// 普通用户
const notMember = [{
				"pagePath": "pages/project/project",
				"iconPath": "/static/default_images/scene.png",
				"selectedIconPath": "/static/default_images/select-scene.png",
				"text": "扫码"
			},
			{
				"pagePath": "pages/index/index",
				"iconPath":"/static/default_images/index.png",
				"selectedIconPath":"/static/default_images/select-index.png",
				"text": "我的"
			}
]
//抛出供外部调用
export default {
	member,
	notMember
}
3.给子组件传值
let token = uni.getStorageSync("token");
			let routes = getCurrentPages(); // 获取当前打开过的页面路由数组
			let curRoute = routes[routes.length - 1].route // 获取当前页面路由,也就是最后一个打开的页面路由
			this.routePath=curRoute;
            //获取缓存里面的tabBar集合
			this.tabBarList= uni.getStorageSync("tabBarList");
            //没用token返回登录爷
			if (!token) {
			  uni.reLaunch({
			    url: '/pages/login/login',
			  })
			}
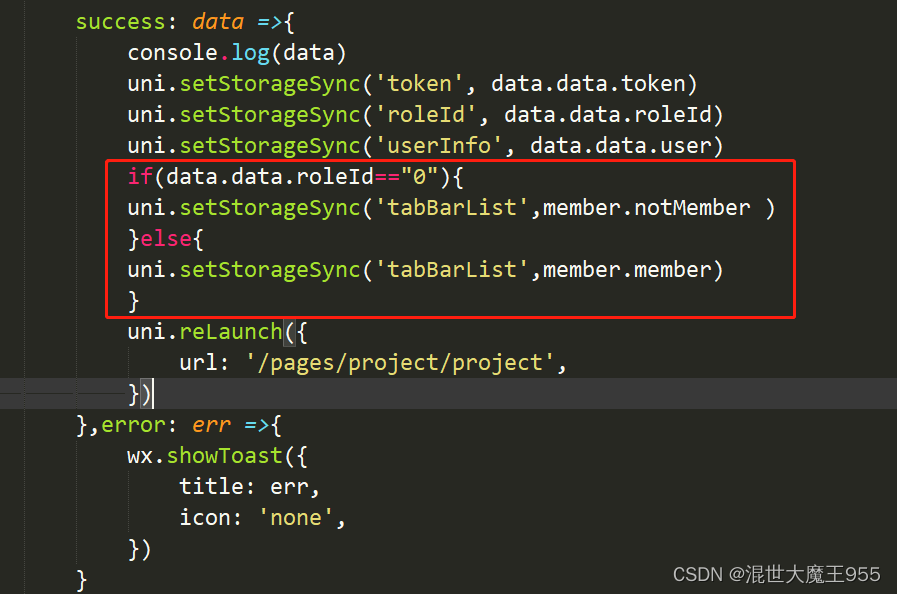
4.登录页判断
我这里设有两个权限 0为工作人员 1为管理人员,根据不同的权限判断把tabBar放入缓存中。

5.隐藏原生tabBar
在app.vue里面
onShow: function() {
uni.hideTabBar()
console.log('App Show')
},
自此我的自定义tabBar就完成了